Installare Visiera anticondensa/antiappannamento Pinlock - Install Pinlock fog resistant lens. Sub
Visiera antiappannamento
La vostra lente Pinlock® è costruita con un materiale plastico in grado di assorbire l’umidità. La guarnizione al silicone sulla lente Pinlock® crea una sacca d’aria isolante fra la lente Pinlock® e la visiera del casco.
I perni dove va ad incastrarsi la lente Pinlock®, sono eccentrici, e questo significa che l’asse del perno non è precisamente al centro.
Questo vi consente di aumentare o diminuire la tensione sulla lente Pinlock® ruotando i perni, consentendo così alla guarnizione al silicone di calzare perfettamente. Attenzione! La lente Pinlock® è meno resistente ai graffi rispetto alla visiera del casco!
INSTALLAZIONE
1. Rimuovere la visiera dal casco come indicato nelle istruzioni dei produttori del casco. (fig. A)
2. Flettere la visiera e inserire la lente Pinlock® fra i due perni presenti nella visiera del casco. (fig. B) Consentire alla visiera di
riacquistare la sua forma curva. La guarnizione al silicone sulla lente Pinlock® deve essere totalmente a contatto con la visiera per
evitare che si formi della condensa fra la visiera e la lente Pinlock®. (fig. C)
Se la guarnizione al silicone non fa bene contatto con la visiera, continuare al paragrafo “Regolare la tensione della lente”.
3. Rimuovere la pellicola di protezione dalla lente Pinlock®.
4. Rimettere la visiera sul casco.
RIMOZIONE
5. Rimuovere la visiera dal casco come indicato nelle istruzioni dei produttori del casco. (fig. A)
6. Flettere delicatamente la visiera fino a quando non ci sarà più tensione sulla lente Pinlock®. Rimuovere delicatamente la lente
Pinlock® dalla sua posizione. (fig. E)
PULIZIA
7. Rimuovere la lente Pinlock® come indicato al paragrafo “RIMOZIONE”. Pulire la lente Pinlock® e la visiera del casco utilizzando solo
sapone liquido delicato, acqua tiepida e un panno morbido leggermente umido. Fare asciugare la lente Pinlock® e la visiera in modo
naturale prima di rimontarle.
NON USARE PRODOTTI DI PULIZIA ABRASAVI O LIQUIDI CONTENENTI AMMONIACA O ALCOOL.
REGOLARE LA TENSIONE DELLA LENTE
8. Rimuovere la lente Pinlock® come indicato al paragrafo “RIMOZIONE”.
9. Regolare i perni spingendoli verso l’esterno e ruotandoli con le dita prima di riportarli indietro. (fig. D)
10.Ripetere il passaggio 2 (INSTALLAZIONE)
Pinlock fog resistant
Your Pinlock® lens is made from a moisture absorbing plastic. The silicon seal on the Pinlock® lens creates an insulating air pocket
between the Pinlock® lens and the helmet shield. The pins, between which the Pinlock® lens is to be fitted, are eccentric, which means
that the axis of the pin is not precisely in the center. This enables you to increase or decrease the tension on the Pinlock® lens by turning
the pins, allowing the silicone seal to have a perfect fit. Please notice! The Pinlock® lens is less resistant to scratching than the helmet
shield!
INSTALLATION
1. Remove the helmet shield from the helmet as shown in the helmet
manufacturers’ instructions. (fig. A)
2. Flex the helmet shield and place the Pinlock® lens between the two pins provided in the helmet shield. (fig. B)
Allow the helmet shield to reacquire its curved shape.
The silicon seal on the Pinlock® lens must make full contact with the helmet shield in order to avoid any condensation forming
between the helmet shield and the Pinlock® lens. (fig. C) If the silicon seal does not make full contact with the helmet shield, please
continue at paragraph “Adjusting lens tension”.
3. Remove the protective film from the Pinlock® lens.
4. Fit the helmet shield back on the helmet.
REMOVING
5. Remove the helmet shield from the helmet as shown in the helmet
manufacturers’ instructions. (fig. A)
6. Flex the helmet shield carefully until there is no more tension on the Pinlock® lens. Carefully remove the Pinlock® lens from its
position. (fig. E)
CLEANING
7. Remove the Pinlock® lens as shown in the paragraph “REMOVING”.
Only clean the Pinlock® lens and the helmet shield using mild liquid soap, lukewarm water and a soft moist cloth. Allow the Pinlock®
lens and the helmet shield to dry naturally before reassembling them.
DO NOT USE ABRASIVE CLEANING PRODUCTS OR LIQUIDS CONTAINING AMMONIA OR ALCOHOL.
ADJUSTING LENS TENSION
8. Remove the Pinlock® lens as shown in the paragraph “REMOVING”.
9. Adjust the pins by pushing them outwards and turning them with your fingers before pushing them back. (fig. D)
10.Repeat step 2 (INSTALLATION)
Pinlock LS2:
https://www.amazon.it/gp/product/B01M4JJMDS/ref=ppx_yo_dt_b_asin_title_o04_s00?ie=UTF8&psc=1
Altri lavori relativi a scooter, auto e garage: https://www.youtube.com/watch?v=4gazaOdZ1y0&list=PLiGgImg_zJ2xEBBgqWnxc7S96F2aJ56Oc
Lavori sullo scooter Kymco people S:
https://www.youtube.com/watch?v=3TkNzGcJcPQ&list=PLiGgImg_zJ2xgosRI8vhfXYzdnDZUNNe7
#GiovanniSavino #Scooter #Garage
Видео Installare Visiera anticondensa/antiappannamento Pinlock - Install Pinlock fog resistant lens. Sub канала Giovanni Savino DIY
Показать
Комментарии отсутствуют
Информация о видео
Другие видео канала
 Addio visiera appannata, come montare il Pinlock sulla visiera
 Montaggio Pinlock - Tutorial sistema anti-appannamento Caschi
 CiMETTOlaTESTA #2 - Visierino anti-appannante Pinlock
 HELMET PINLOCK INSTALLATION | FOG RESISTANT LENS | AGV K3 SV VISOR
![Airoh Commander. Casco on-off in fibre composite [ENG FRA sub.]](https://i.ytimg.com/vi/qwP70WlH8mg/default.jpg) Airoh Commander. Casco on-off in fibre composite [ENG FRA sub.]
Airoh Commander. Casco on-off in fibre composite [ENG FRA sub.] How to install the Pinlock Lens
 Casco Shark Evo One - Montaggio Pinlock
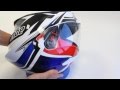 Come fare per...cambiare la visiera: AGV K5 / K3 SV
 É LEGALE CAMBIARE VISIERA DEL CASCO ?
 How to assemble the pinlock inner visor on X-LITE X-803 start flat black Motorcycle helmet
 Come igienizzare e pulire un casco
 CiMETTOlaTESTA - SENA SRL per NEOTEC II installazione e abbinamento
 Scorpion Exo Tech. Ecco l'ultimo modulare Flip Back di Scorpion
 How to fit a Pinlock visor insert | Products | Motorcyclenews.com
 Caschi AGV: la tecnologia Ultravision, le visiere più spesse e l'importanza del Pinlock
 Come e dove Installare sulla moto la GoPro
 Tutorial: rinnovare la plastica del bauletto.
 come rigenerare visiere fari e parabrezza in policarbonato - ultimate edition
 MAAcademy: Scelta del casco adatto al viaggio
 Casco modulare LS2 FF399 Valiant