DIY BOX
Creating a simple yet beautiful square box can be a fun and rewarding project. Here's a step-by-step guide to make the prettiest square box with minimal materials and effort:
**Materials Needed:**
1. Cardstock paper or decorative paper of your choice.
2. Ruler.
3. Pencil.
4. Scissors.
5. Glue or double-sided tape.
6. Decorative elements (e.g., ribbons, stickers, or paint).
**Step 1: Choose Your Paper**
Select a piece of decorative paper or cardstock for your box. The paper's design and color should match your desired aesthetic.
**Step 2: Measure and Cut**
- Decide how large you want your square box to be. Let's say you want it to be 3.6cm* 6cm.
- Using a ruler and pencil, measure and mark a square on the backside of your chosen paper.
- Cut out the square carefully along the marked lines.
**Step 3: Score the Lines**
To make it easier to fold and create clean edges, use the ruler and scissors to lightly score lines on the square.
**Step 4: Cut Flaps**
On each corner of your square, make small cuts on the scored lines. These cuts should extend halfway to the center of the square. This will help create flaps for folding.
**Step 5: Fold the Flaps**
Fold each of the four flaps inward along the scored lines. These will form the sides of your box.
**Step 6: Assemble the Box**
- Apply glue or double-sided tape to the inside of one of the flaps.
- Attach this flap to the adjacent side, forming a corner of the box.
- Repeat this step for the remaining three corners, attaching each flap to the adjacent side.
**Step 7: Secure the Bottom**
Apply glue or double-sided tape to the flaps on the bottom of the box.
Fold these flaps inward and press them together to seal the bottom of the box.
**Step 8: Decorate**
Add any decorative elements you desire. You can use ribbons, stickers, paint, or other embellishments to make your box unique and visually appealing.
**Step 9: Let It Dry**
Allow your box to dry completely if you used glue. This will ensure the box remains sturdy.
Your prettiest square box is now complete! It's a simple project that can be customized in countless ways to suit various occasions, from gift-giving to storage and organization.
Видео DIY BOX канала Create Inspire Repeat
Показать
Комментарии отсутствуют
Информация о видео
Другие видео канала
 HOW TO EARN MONEY BY WATCHING YOUTUBE DIY VIDEOS/ HOW TO MAKE BOXES AND EARN MONEY DIY box tutorial
 Shocking True Story
 Mini cute book box favors🥰
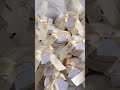 ❤️
❤️ Balloon Elephant for Party🎈
 Aesthetic wedding favor boxes|Favours|
 💙
💙 How To Decorate Easter Eggs/Easter Eggs DIY Decorations/Пасхальный Декор/Идеи Для Пасхи/DIY Eggs
 Raffaello & Kinder Bouquet
 Box Master Class
 So you like it? #wrapping #bouquet #flowers #flower #bouquetflowers #flowerwrapping
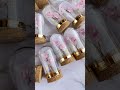 Cute dome favors😍
 COOL DIY DECOR
 DIY MASON BALL JARS
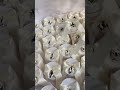 Available on instagram
 DIY Air Dry Christmas Red Truck
 ❤️❤️❤️
 Ai generated a Howl and Sophie turning into Robots. #stablediffusionanimation #deforum #ghibli #Howl
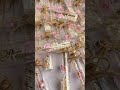 ❤️❤️❤️
 DIY Glitter foam rose/ Foamiran rose/how to make rose from foamiran/Easy rose technique/DIY rose