Selbstgebaute Roboterhand aus dem 3D-Drucker – Arduino gesteuert! Bionic Hand - Arduino Hand
🌟 Projekte für die Zukunft – Robotische Handprothese DIY 🌟
Willkommen auf meinem Kanal! Heute zeige ich euch meine selbstgebaute, 3D-gedruckte Roboterhand mit flexiblen Fingern, die durch Servos und eine Steuerplatine bewegt wird. Die Kombination aus 3D-Druck, Mikrocontroller-Technik und Mechanik macht dieses Projekt einzigartig.
🔧 Was ihr im Video seht:
✅ Mechanische Hand aus 3D-gedruckten Teilen
✅ Servo-Motoren zur Fingersteuerung
✅ Steuerung über Arduino
✅ Kabelmanagement und Elektronik
✅ Realistische Bewegung der Finger
💡 Was kommt als Nächstes?
In Zukunft möchte ich die Bewegungen mit einem Handschuh steuern, Sensoren einbauen und die Software weiterentwickeln.
🎥 Bleibt dran – abonniert den Kanal für weitere spannende Projekte!
👍 Wenn euch das Video gefällt, lasst ein Like da und schreibt mir eure Fragen oder Ideen in die Kommentare.
💻 Verwendete Hardware:
Arduino Nano : https://ebay.us/m/8IN7g6
SG90 Servomotoren : https://ebay.us/m/GpmJLl
3D-gedruckte Teile
Kabel und Elektronik
💬 Folgt mir für mehr Inspirationen!
🔗 Tiktok: https://www.tiktok.com/@hdrobotics?is_from_webapp=1&sender_device=pc
🔗 Website: hdrobotics.de
https://ebay.us/m/S9ivAP
3D Design and Code : https://makerworld.com/de/models/1482655-bionic-hand-mecha-hand-diy-hd-robotics#profileId-1548408
Danke fürs Zuschauen! 🙌
English Translate : Hello and welcome to my new video about my project MechaHand or ArduinobionicHand!
In this video, I will show you how to assemble all the parts and build the ArduinobionicHand.
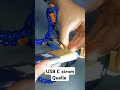
First, I’ll start with the controller. I want to check if all parts and dimensions fit together in my new design.
That’s why you should watch the video until the end—then you’ll understand how to rebuild the entire hand and the whole project.
Once I see that everything fits, I can begin the assembly. This is a completely new design.
In my old design, the controller gloves caused some discomfort in my hand.
I’ve fixed this issue in the current video, and I hope it works better now.
The principle is quite simple:
It all runs on an Arduino Nano.
I’ve also built a wireless version, and a tutorial video for that will be released later.
This video is about the wired version.
The way it works is simple:
When the potentiometer values change, a signal is sent to the Arduino Nano.
The Arduino adjusts the servo motor positions, which makes the fingers move.
When the potentiometers return to their original position, the fingers move back accordingly.
It simulates the movement of a real hand.
Thank you so much for watching!
I’ll share the code and STL files with you—just follow me on Instagram, TikTok, and YouTube.
See you next time!
I used different materials—some parts are made of PLA, others of PETG.
In the end, I realized that PETG works better, so I reprinted a few parts and replaced the PLA components.
Now I’ll leave you to enjoy my project—you can see how to assemble everything.
Later, I’ll also make a demonstration video showing all the functions of my bionic arm.
Don’t forget to comment, share your suggestions, and like the video!
Thank you for watching!
If you need the code and STL files right now, just leave a comment in the video description, and I’ll share them with you.
#arduino #bionichand #arduinohand
Видео Selbstgebaute Roboterhand aus dem 3D-Drucker – Arduino gesteuert! Bionic Hand - Arduino Hand канала HD Robotics
Willkommen auf meinem Kanal! Heute zeige ich euch meine selbstgebaute, 3D-gedruckte Roboterhand mit flexiblen Fingern, die durch Servos und eine Steuerplatine bewegt wird. Die Kombination aus 3D-Druck, Mikrocontroller-Technik und Mechanik macht dieses Projekt einzigartig.
🔧 Was ihr im Video seht:
✅ Mechanische Hand aus 3D-gedruckten Teilen
✅ Servo-Motoren zur Fingersteuerung
✅ Steuerung über Arduino
✅ Kabelmanagement und Elektronik
✅ Realistische Bewegung der Finger
💡 Was kommt als Nächstes?
In Zukunft möchte ich die Bewegungen mit einem Handschuh steuern, Sensoren einbauen und die Software weiterentwickeln.
🎥 Bleibt dran – abonniert den Kanal für weitere spannende Projekte!
👍 Wenn euch das Video gefällt, lasst ein Like da und schreibt mir eure Fragen oder Ideen in die Kommentare.
💻 Verwendete Hardware:
Arduino Nano : https://ebay.us/m/8IN7g6
SG90 Servomotoren : https://ebay.us/m/GpmJLl
3D-gedruckte Teile
Kabel und Elektronik
💬 Folgt mir für mehr Inspirationen!
🔗 Tiktok: https://www.tiktok.com/@hdrobotics?is_from_webapp=1&sender_device=pc
🔗 Website: hdrobotics.de
https://ebay.us/m/S9ivAP
3D Design and Code : https://makerworld.com/de/models/1482655-bionic-hand-mecha-hand-diy-hd-robotics#profileId-1548408
Danke fürs Zuschauen! 🙌
English Translate : Hello and welcome to my new video about my project MechaHand or ArduinobionicHand!
In this video, I will show you how to assemble all the parts and build the ArduinobionicHand.
First, I’ll start with the controller. I want to check if all parts and dimensions fit together in my new design.
That’s why you should watch the video until the end—then you’ll understand how to rebuild the entire hand and the whole project.
Once I see that everything fits, I can begin the assembly. This is a completely new design.
In my old design, the controller gloves caused some discomfort in my hand.
I’ve fixed this issue in the current video, and I hope it works better now.
The principle is quite simple:
It all runs on an Arduino Nano.
I’ve also built a wireless version, and a tutorial video for that will be released later.
This video is about the wired version.
The way it works is simple:
When the potentiometer values change, a signal is sent to the Arduino Nano.
The Arduino adjusts the servo motor positions, which makes the fingers move.
When the potentiometers return to their original position, the fingers move back accordingly.
It simulates the movement of a real hand.
Thank you so much for watching!
I’ll share the code and STL files with you—just follow me on Instagram, TikTok, and YouTube.
See you next time!
I used different materials—some parts are made of PLA, others of PETG.
In the end, I realized that PETG works better, so I reprinted a few parts and replaced the PLA components.
Now I’ll leave you to enjoy my project—you can see how to assemble everything.
Later, I’ll also make a demonstration video showing all the functions of my bionic arm.
Don’t forget to comment, share your suggestions, and like the video!
Thank you for watching!
If you need the code and STL files right now, just leave a comment in the video description, and I’ll share them with you.
#arduino #bionichand #arduinohand
Видео Selbstgebaute Roboterhand aus dem 3D-Drucker – Arduino gesteuert! Bionic Hand - Arduino Hand канала HD Robotics
Arduino Bionic Hand Robotics MechaHand Arduino Nano 3D Printing Servo Motor DIY Projekte Maker Community Arduino Project Hand Prosthesis Bionic Arm STL Files Potentiometer Servo Control Engineering Arduino Tutorial 3D Druck Maker Movement Technology Electronics Robotic Hand Hand Prothesen Wireless Controller Open Source Prosthetics
Комментарии отсутствуют
Информация о видео
1 июня 2025 г. 22:09:25
00:12:33
Другие видео канала