Exercise 22: How to model a 'Wrench Tool' in Solidworks 2018 || Solidworks Surfacing
Watch a free SOLIDWORKS Boeing 747 video here ➜ https://easycadsolutions--learnsolidworks.thrivecart.com/learnsolidworks-boeing-747-course/
Grab a free SOLIDWORKS Superyacht eBook here ➜ https://easycadsolutions--learnsolidworks.thrivecart.com/learnsolidworks-yacht-tutorial/
------------------------------------------------------------------------------------------------------------------------------------------------------------
#easycadsolutions
In this surfacing video, you will learn how to redesign a "Wrench Tool'' mostly by using surfacing commands in Solidworks. After following this video tutorial you will discover some new techniques to model the flowing surfaces by using the surface loft and split line command in Solidworks and also this tutorial will give you an idea to redesign an existing product from the scratch.
If you like the content then please hit the like button and subscribe to my YouTube for more useful videos.
Important Commands Used:
-Loft Surface
-Fill Surface
-Surface Extend
-Trim Surface
-Surface Knit
-Delete Face
-Split Line
-Extrude Boss/ Base (with contours)
-Reference Geometry (Plane and Point)
-Fillet (Face Fillet with Chord Width)
-Chamfer (with Chord Width)
-Curvature Continous Fillets
-Wrap (Text on Spline Surface)
-Change Appearance
Reference Image:https://in.pinterest.com/pin/363384263681519591/
CAD File Link: Available Soon
Contact Info:(For Freelance Work)
WhatsApp: +919793662583
Email ID: nishant13071992@gmail.com
LinkedIn: https://www.linkedin.com/in/nishant-gautam-86253a100/
Видео Exercise 22: How to model a 'Wrench Tool' in Solidworks 2018 || Solidworks Surfacing канала Easy CAD Solutions
Показать
Комментарии отсутствуют
Информация о видео
Другие видео канала
 Exercise 33: How to make 'Modern Flower Pot Design' in Solidworks 2018
 Advanced Surface Modeling - SolidWorks
 Exercise 26: How to make a 'Heart Pendant' in Solidworks 2018
 Exercise 32: How to make 'Striped Vase' in Solidworks 2018
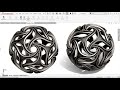 Exercise 23: How make 'Complex Spherical Pattern' in Solidworks 2018
 Exercise 19: How to model a 'Step Cube Design' in Solidworks 2018
 Exercise 28: How to make 'Artistic Table Pattern' in Solidworks 2018
 shaver design in solidworks | advanced surfacing
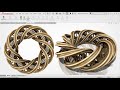 Exercise 25: How to model a 'DNA Mobius' in Solidworks 2018
 Exercise 24: How to model a 'Self Interlocking Single Body Mobius 'in Solidworks 2018
 Exercise 29: How to make 'Leaf Pattern on Sphere' in Solidworks 2018
 Solidworks Tutorial # 190 Design a Double Cardan Shaft Assembly in Solidworks by SW Easy Design
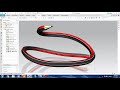 NX CAD # tutorial 7.9 # Advanced Tutorial #Pencil modeling #Studio Spline
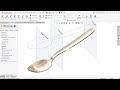 Solidworks Surface Tutorial | How to make Spoon in Solidworks
 「DESIGN 185」 How to design BASEBALL CAP by Solidworks
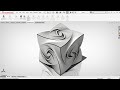 Exercise 16: How to model a 'Complex Cube Design' in Solidworks 2018
 Solidworks tips and tutorials : Converting assembly to multibody to single part
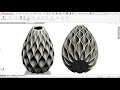 Exercise 17: How to model a 'Sequence Vase Design' in Solidworks 2018
 Exercise 21: How to model a 'Silk Shaver' in Solidworks 2018 || Solidworks Surfacing