- Популярные видео
- Авто
- Видео-блоги
- ДТП, аварии
- Для маленьких
- Еда, напитки
- Животные
- Закон и право
- Знаменитости
- Игры
- Искусство
- Комедии
- Красота, мода
- Кулинария, рецепты
- Люди
- Мото
- Музыка
- Мультфильмы
- Наука, технологии
- Новости
- Образование
- Политика
- Праздники
- Приколы
- Природа
- Происшествия
- Путешествия
- Развлечения
- Ржач
- Семья
- Сериалы
- Спорт
- Стиль жизни
- ТВ передачи
- Танцы
- Технологии
- Товары
- Ужасы
- Фильмы
- Шоу-бизнес
- Юмор
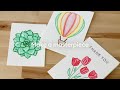
How to Use Print Then Cut with Cricut Joy 2 | Make Custom Stickers
Learn how to use Print Then Cut with Cricut Joy 2 to create colorful custom stickers, labels, decals, and more. In this quick tutorial, we’ll show you how to start your project in Cricut Design Space, print your design, place it on a machine mat, and let Cricut Joy 2 cut it with precision.
With Print Then Cut, you can turn your favorite designs into polished, personalized projects for planners, gifts, cards, organization, and everyday crafting.
In this video:
• Start a Print Then Cut project in Cricut Design Space
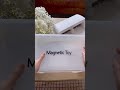
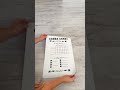
• Print your design at home
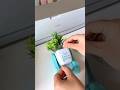
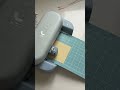
• Load your printed sheet onto a Cricut mat
• Cut your design with Cricut Joy 2
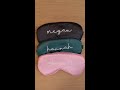
• See finished sticker and decal project ideas
Perfect for beginners, sticker making, and anyone who wants to get more from their Cricut Joy 2.
Follow Cricut on social
Facebook: https://www.facebook.com/cricut
Instagram: https://www.instagram.com/cricut
TikTok: https://www.tiktok.com/@cricut
Pinterest: https://www.pinterest.com/cricut
Find more inspiration at https://cricut.com/blog
Join our Facebook group https://facebook.com/groups/cricutofficial
Видео How to Use Print Then Cut with Cricut Joy 2 | Make Custom Stickers канала Cricut
With Print Then Cut, you can turn your favorite designs into polished, personalized projects for planners, gifts, cards, organization, and everyday crafting.
In this video:
• Start a Print Then Cut project in Cricut Design Space
• Print your design at home
• Load your printed sheet onto a Cricut mat
• Cut your design with Cricut Joy 2
• See finished sticker and decal project ideas
Perfect for beginners, sticker making, and anyone who wants to get more from their Cricut Joy 2.
Follow Cricut on social
Facebook: https://www.facebook.com/cricut
Instagram: https://www.instagram.com/cricut
TikTok: https://www.tiktok.com/@cricut
Pinterest: https://www.pinterest.com/cricut
Find more inspiration at https://cricut.com/blog
Join our Facebook group https://facebook.com/groups/cricutofficial
Видео How to Use Print Then Cut with Cricut Joy 2 | Make Custom Stickers канала Cricut
Cricut DIY cutting machine Cricket machine cricut joy 2 cricut joy 2 print then cut print then cut cricut joy 2 cricut print then cut how to use print then cut cricut sticker tutorial make stickers with cricut cricut stickers cricut beginner tutorial diy stickers sticker making cricut labels cricut decals cricut projects cricut joy 2 tutorial print then cut stickers cricut crafts craft tutorial homemade stickers cricut machine tutorial cricut joy
Комментарии отсутствуют
Информация о видео
18 ч. 27 мин. назад
00:01:17
Другие видео канала