TAPE EXTENSIONS TUTORIAL
consult with your client to discuss their desired end result. From here, you will determine the length, color, and placement pattern. You will also discuss pricing and maintenance with your client.
Always match the swatch to the middle and end of your client's hair, not at the root. The extensions should match the color of the natural hair that is being placed on top of them.
Because our client has heavy highlights, two shades will be used to create a seamless match. We will be applying 12/DB2, which is a dark blonde highlighted shade, along with #24, which is a light natural blonde.
We will be using darker shade (12/DB2), as the top half of the sandwich so that it will be more dominant. Using the lighter shade of #24 on top would create an overall lighter appearance.
Blend the extensions through the clients natural hair to make sure it blends seamlessly
To begin applying the extensions, first part the hair from ear to ear and divide into two sections down the middle.
In order for the extensions to bond properly, the hair must be clarified at least two times with Ostia (OH-steeyuh) Collection Clarifying Shampoo. Conditioner or other styling products must not be applied after clarifying. Make sure to thoroughly shampoo and rinse the nape of the neck and the hairline, as these two areas are commonly ignored. This step is CRITICAL. Extensions will slip if the hair is not clarified properly.
Next, blowdry the hair straight with a Tony Odisho Extensions paddle brush.
Our first row will begin about 2 inches above the nape. Be sure to leave out 1" around the perimeter of the head so that the extensions do not show.
Next we will map out the placement of the tape extensions. The first row will have two pieces, and a bricklayer pattern will be used in subsequent rows.
Extensions should be placed at least ½" from the scalp. Placing them too close to the scalp can cause too much tension on the hair and result in breakage.
Peel the backing from your first extensions.
Видео TAPE EXTENSIONS TUTORIAL канала Tony Odisho
Показать
Комментарии отсутствуют
Информация о видео
Другие видео канала
 How to: HaloCouture Tape-In Extensions
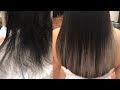 How to do Tape in Extension Grey Ombre by EuqinaD close up tutorial using Hothead Hairtalk hair
 EXTENSIONS TIPS AND TRICKS
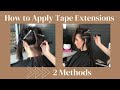 How to Apply Tape Extensions - 2 Methods
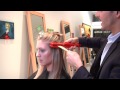 A-list Hair Extensions International - Tape In Extensions Application Video
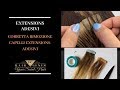 Rimozione capelli adesivi ✅come facile rimuovere i capelli extension adesivi a casa
 HOW TO APPLY TAPE IN HAIR EXTENSIONS | Step by step tutorial
 TAPE IN EXTENSION PLACEMENT + BLENDING AND STYLING
 Seamless Hair Extensions Application Tutorial - Thicken It Studios
 Silk press and tape in extensions
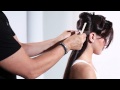 Applying Invisi-Tab Tape Hair Extensions
 How to Apply Tape In Extensions
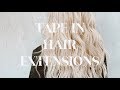 TAPE IN HAIR EXTENSIONS | BEAUTY SCHOOL SERIES
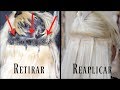 COMO RETIRAR Y REAPLICAR EXTENSIONES ADHESIVAS/TAPE IN
 How to Cut Hair Extensions
 How to Apply Tape-In Extensions
 HOW I APPLY AND REMOVE MY HAIR EXTENSIONS MYSELF!! | DIY TAPE HAIR EXTENSIONS | ZALA HAIR EXTENSIONS
 Easiest way to remove TAPE IN EXTENSIONS at home with NO DAMAGE
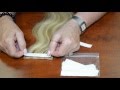 How To Remove and Replace Tape In Hair Extensions
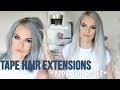 HOW TO APPLY TAPE HAIR EXTENSIONS | Kirstie Roche