- Популярные видео
- Авто
- Видео-блоги
- ДТП, аварии
- Для маленьких
- Еда, напитки
- Животные
- Закон и право
- Знаменитости
- Игры
- Искусство
- Комедии
- Красота, мода
- Кулинария, рецепты
- Люди
- Мото
- Музыка
- Мультфильмы
- Наука, технологии
- Новости
- Образование
- Политика
- Праздники
- Приколы
- Природа
- Происшествия
- Путешествия
- Развлечения
- Ржач
- Семья
- Сериалы
- Спорт
- Стиль жизни
- ТВ передачи
- Танцы
- Технологии
- Товары
- Ужасы
- Фильмы
- Шоу-бизнес
- Юмор
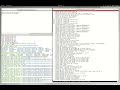
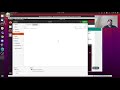
IoT Training #04 - MQTT Cheerlights on the ESP32 TinyPico with Arduino IDE
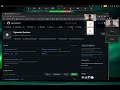
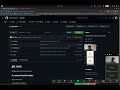
Here we walk through you how to build an Internet of Things (IoT) application with the Arduino IDE for the TinyPico board. We are using the MQTT protocol to implement #CheerLights (https://cheerlights.com/).
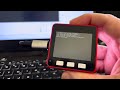
Cheerlights lets you tweet a colour and every Cheerlights enabled device in the world will change to that colour! You can have a cheerlights device on your desk too!
This IoT video follows on from part one and part three.
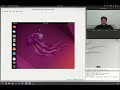
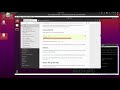
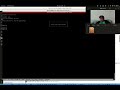
Part one shows you how to create an Ubuntu Linux virtual machine to use to develop embedded software.
@see part one here - https://youtu.be/zp-QscB2rIg
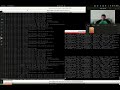
Part three shows you how to install the Arduino IDE and get it set up ready to work with ESP32 based boards such as the TinyPico
@see part three here - https://youtu.be/e_8wiFn3Cc8
You don't have to go through part 1 and instead you can just install everything to your host Linux system if you wish, but if you prefer to be doing everything as in these tutorials then it's best to work through part 1 first.
Видео IoT Training #04 - MQTT Cheerlights on the ESP32 TinyPico with Arduino IDE канала Dynamic Devices - IoT Training
Cheerlights lets you tweet a colour and every Cheerlights enabled device in the world will change to that colour! You can have a cheerlights device on your desk too!
This IoT video follows on from part one and part three.
Part one shows you how to create an Ubuntu Linux virtual machine to use to develop embedded software.
@see part one here - https://youtu.be/zp-QscB2rIg
Part three shows you how to install the Arduino IDE and get it set up ready to work with ESP32 based boards such as the TinyPico
@see part three here - https://youtu.be/e_8wiFn3Cc8
You don't have to go through part 1 and instead you can just install everything to your host Linux system if you wish, but if you prefer to be doing everything as in these tutorials then it's best to work through part 1 first.
Видео IoT Training #04 - MQTT Cheerlights on the ESP32 TinyPico with Arduino IDE канала Dynamic Devices - IoT Training
Комментарии отсутствуют
Информация о видео
5 октября 2021 г. 0:55:06
00:46:08
Другие видео канала