- Популярные видео
- Авто
- Видео-блоги
- ДТП, аварии
- Для маленьких
- Еда, напитки
- Животные
- Закон и право
- Знаменитости
- Игры
- Искусство
- Комедии
- Красота, мода
- Кулинария, рецепты
- Люди
- Мото
- Музыка
- Мультфильмы
- Наука, технологии
- Новости
- Образование
- Политика
- Праздники
- Приколы
- Природа
- Происшествия
- Путешествия
- Развлечения
- Ржач
- Семья
- Сериалы
- Спорт
- Стиль жизни
- ТВ передачи
- Танцы
- Технологии
- Товары
- Ужасы
- Фильмы
- Шоу-бизнес
- Юмор
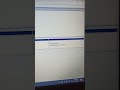
Set Up Primary Display Adaptor | BIOS Tutorial in Hindi for Multiple Monitors in Hindi
Are you facing a black screen after replacing your CMOS battery? This video tackles a common issue where the computer turns on but the display doesn't work.
The Problem:
The culprit might be your BIOS settings. By default, BIOS might be set to disable integrated graphics when an add-on graphics card is detected. This happens because the setting is "Enable if Primary" for integrated graphics.
The Fix:
Access BIOS: Refer to your motherboard manual for instructions.
Locate Graphics Settings: Look for options related to "Integrated Graphics" or "Primary Graphics Adapter".
Enable Integrated Graphics: Change "Integrated Graphics Device" to "Always Enable" or set "Primary Graphics Adapter" to "Integrated Graphics".
Connect Display Cable: Move the display cable from the add-on card to the motherboard's integrated graphics port.
Restart Your PC: The display should now work after the restart.
Additional Tips:
If you prefer using the add-on card, set "Primary Graphics Adapter" to "PCI Express" in BIOS.
For utilizing both integrated and add-on graphics, explore features like "Multi-Monitor" or "Hybrid Graphics" in BIOS (if available).
By following these steps, you should be able to resolve the no-display issue after replacing the CMOS battery.
Leave a comment below if you have any questions!
Like this video if it helped!
Don't forget to Subscribe for more tech tutorials!
Видео Set Up Primary Display Adaptor | BIOS Tutorial in Hindi for Multiple Monitors in Hindi канала The Guru
Комментарии отсутствуют
Информация о видео
12 июля 2023 г. 18:50:05
00:04:59
Другие видео канала