OpenMV Screen Tutorial ST7735 - M7, H7 or H7 Plus
In this OpenMV tutorial, we connect our familiar, $5 1.8" Color TFT display (ST7735 driver) to the OpenMV camera module and display live data to it. Let's get started!
Subscribe for weekly videos ▶ https://bit.ly/33KIQ09
A few months ago, I reviewed the impressive OpenMV m7 camera. If you are not familiar with it, the OpenMV camera module is a new board that aims to bring Machine Vision closer to makers. They want to make Machine vision easy and fun to use. The board features a camera module and a very powerful processor which can be programmed using microPython. Please check the detailed video review of the OpenMV cam for more details.
The more I use this camera module, the more I understand how capable this thing really is. The specs are fantastic. The creators of the board have also created some addon shields for it, to further improve its potential. One of the most useful shields for a beginner is the LCD shield because it allows you to debug your OpenMV script without the need of a computer. After taking a closer look at the LCD shield, I discovered that it uses our familiar 1.8" Color TFT display. If you are a long time viewer of the channel, you know that I love this display and I have used it many times in the past with Arduino. It is very easy to use, it offers a resolution of 160x128 pixels, it is fast and it is inexpensive. Last, but not least, it costs just $5! You can find a link to it in the description of the video below and ofcourse a link to the LCD shield from OpenMV.
--------------------
WHERE TO BUY
--------------------
OpenMV: http://educ8s.tv/part/OpenMV
NEW & Faster OpenMV H7: http://educ8s.tv/part/OpenMVH7
Color TFT: http://educ8s.tv/part/7735
LCD Shield: https://openmv.io/products/lcd-shield
Prototyping Board: http://educ8s.tv/part/PrototypingBoards
Wires: http://educ8s.tv/part/Wires
Robot Kit: http://educ8s.tv/part/RobotKit
-------------------------
CODE OF THE PROJECT
--------------------------------
https://educ8s.tv/openmv-screen-st7735-tutorial
--------------------
Quiz of Knowledge Android Game
--------------------
You can download my latest Android Game which is called Quiz of Knowledge here:
📥 http://bit.ly/QuizOfKnowledge
--------------------
MORE PROJECTS
--------------------
Arduino Datalogger: https://www.youtube.com/watch?v=oei3Y6tOhVI
Arduino Weather Station Project: https://www.youtube.com/watch?v=9jN-3DtS1RI
Arduino Nokia 5110 LCD Display: https://www.youtube.com/watch?v=aDwrMeu4k9Y
Arduino OLED display tutorial: https://www.youtube.com/watch?v=A9EwJ7M7OsI
DIY Arduino: https://www.youtube.com/watch?v=npc3uzEVvc0
--------------------
ABOUT EDUC8S.TV
--------------------
Educ8s.tv is a Youtube channel and website which is dedicated in developing high quality videos about DIY hardware and software projects. In this channel we develop projects with Arduino, Raspberry Pi, we build robots and simple electronic circuits. Check out our website as well for more information: http://www.educ8s.tv
--------------------
SUBSCRIBE ON YOUTUBE
--------------------
Never miss a video: https://www.youtube.com/subscription_center?add_user=educ8s
Видео OpenMV Screen Tutorial ST7735 - M7, H7 or H7 Plus канала educ8s.tv
Показать
Комментарии отсутствуют
Информация о видео
Другие видео канала
 Pixy2 Camera - Image Recognition for Arduino & Raspberry Pi
 Getting Started with the OpenMV Cam: Machine Vision with MicroPython | Digi-Key Electronics
 OpenMV Tutorial: Control DC Motors with the L298N driver module
 The best low power display? E-Paper Tutorial
 Re-loadable CNN on the OpenMV Cam M7/H7 with CMSIS-NN
 FLIR Lepton 1/2/3 on the OpenMV Cam H7
 OLED Displays with Arduino - I2C & SPI OLEDs
 Tinkerforge: Making Thermal Camera and Robot from Building Blocks
 DIY Transparent Screen
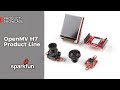 Product Showcase: OpenMV H7 Product Line
 How easy is it to visual track an object? PSVR Headset Tracker with the OpenMV-H7 Camera!
 Pixy 2 Machine Vision Camera Review with Arduino
 The New OpenMV Cam H7
 Thermal Imaging and Its Applications
 OpenMV Cam H7 Kickstarter Video
 ESP32-CAM + TFT Screen + 3D Print - SelfieCam
 DIY PCBs At Home (Single Sided Presensitized)
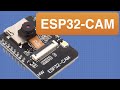 ESP32 CAM - 10 Dollar Camera for IoT Projects
 100+ FPS IR LED Tracking with the OpenMV Cam H7 Plus