Quake - e1m6 NH in 0:47
Another legendary demo down!
To explain the kill count at the end - there is an ogre getting spawned at 0:18 in the video in the back of that spike trap area that I don't kill. This ogre has the ability to escape the spike trap himself, but sometimes he will just wander back in and gets squished on the other end of the spike trap instead, which is exactly what happened here. And YES, kills after the level has ended and happen in the intermission screen DO COUNT TOWARDS 100% COMPLETION.
There are of course differences compared to Peter's route, the following being:
- Taking rockets at the starting platform. This loses a maximum of a tenth of a second but helps with a ton of things. I have to worry less about barely missing hard shots to not gib ogres and taking their rockets, more importantly, it helps with getting a clean join on the gold key platform, and more importantly, baiting the ogre more consistently to hit the shambler with a grenade to start an infight and getting out of my way.
- Early rocket shot down the hallway. Helps getting early kills so as to not get blocked as much when coming back to the main area. This attempt I got 2 ogres with it which is very nice.
- Optimised movement down to the spike trap area, saving a ton of time.
- Lucky shambler boost who somehow also starts an infight with an ogre and dies. Godlike luck that I deserved after the hundreds of attempts I had.
- Better rockets out of the teleporter.
- Circlestrafe around the last shambler to not take hits, will help get a better time on e1m7 for a future QdQ NH project.
- Intermission kill at the end. I barely had any ammo left to spare, thank god that ogre was low on HP!
Видео Quake - e1m6 NH in 0:47 канала Muty
Показать
Комментарии отсутствуют
Информация о видео
Другие видео канала
 HL AsT: Residue Processing - The Meatgrab
 Teaser
![Half-Life: C.A.G.E.D. in 3:50.949 [WR]](https://i.ytimg.com/vi/xotS0QoZNu8/default.jpg) Half-Life: C.A.G.E.D. in 3:50.949 [WR]
Half-Life: C.A.G.E.D. in 3:50.949 [WR]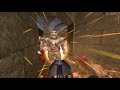 Quake - Episode 2 Nightmare 100% Speedrun in 13:46
 Blood: Fresh Supply 1.9.10 Great Temple Skip New Setup
 Blood Speedrun Tutorial - Part 4/6 - Episode 2
 Blood - Cradle to Grave - 0:16
![Quake Speedrun in 11:57[PB]](https://i.ytimg.com/vi/wIsCfGlc8kA/default.jpg) Quake Speedrun in 11:57[PB]
Quake Speedrun in 11:57[PB] zjumps in 26.252
 Half-Life - WON,Scriptless - 30:32
![Half-Life: Blue Shift in 25:34.675[Former World Record]](https://i.ytimg.com/vi/rX1xXO303H0/default.jpg) Half-Life: Blue Shift in 25:34.675[Former World Record]
Half-Life: Blue Shift in 25:34.675[Former World Record]![Quake ER in 13:47 [SS]](https://i.ytimg.com/vi/T9WJ3FY_Zl8/default.jpg) Quake ER in 13:47 [SS]
Quake ER in 13:47 [SS]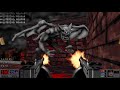 Blood - E1M7 EXTRA CRISPY 100% IL in 2:32
![Half-Life Speedrun in 26:04.761[Scripted, Former WR]](https://i.ytimg.com/vi/Op68WoYopX8/default.jpg) Half-Life Speedrun in 26:04.761[Scripted, Former WR]
Half-Life Speedrun in 26:04.761[Scripted, Former WR]![Blood - Any% No Episode Warp in 12:59[Former WR]](https://i.ytimg.com/vi/r9RvZuYkl-g/default.jpg) Blood - Any% No Episode Warp in 12:59[Former WR]
Blood - Any% No Episode Warp in 12:59[Former WR] xen27
xen27 barrelblyatv2
![Half-Life - c1a0 in 13.368 [100FPS,Scriptless,WON]](https://i.ytimg.com/vi/yQH-gPEc13A/default.jpg) Half-Life - c1a0 in 13.368 [100FPS,Scriptless,WON]
Half-Life - c1a0 in 13.368 [100FPS,Scriptless,WON]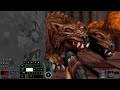 Blood Speedrun Tutorial - Part 6/6 - Episode 4
 Blood Speedrun Tutorial - Part 3/6 - Episode 1
 Blood - Episode 3 Extra Crispy Speedrun in 4:39