How to Decoupage the Inside of Drawer - Line a Drawer with Tissue Paper Tutorial - Easy/Beginner
This video shows my foolproof, mess-proof, stress-proof decoupage technique! This is the first time I’ve decoupaged anything and wow it was surprisingly quick and easy to do with tissue paper, spray adhesive, a spray sealer, an iron and parchment paper to create a strong, wrinkle-free bond.
This video tutorial is for how to decoupage the inside of a vanity drawer to create a one-of-a-kind drawer liner.
Here are the products and supplies I used:
Krylon Spray Adhesive all purpose
Aleene’s Acrylic Sealer (matte finish)
1 large 11 x 14 piece of decorative tissue paper
Annie Sloan Chalk Paint Lacquer (clear matte, UV protection) Varnish
Paintbrushes
Exacto knife and ruler
Iron and parchment paper
Sandpaper (400 grit)
Steps:
- Clean, paint and prep the surface (in this case, the inside of the drawer).
- Spray the Krylon Spray Adhesive onto the surface, making sure the glue is evenly distributed.
- Attach the tissue paper to the drawer. The adhesive stays tacky for about 30 minutes, so you can take your time positioning it. I choose to cut the tissue paper in advance to the shape of the drawer, leaving an extra inch or so of paper so that it was slightly larger than the drawer. This made it much easier to work with.
- Once the paper is placed where you want it, smooth it out so there are no air pockets. Start in the center and work your way out. You can lift up the paper and readjust it as you go if that’s easier.
- After the tissue paper is securely in place on the inside the drawer, use an exacto knife and a ruler to cut away excess paper. The paper will off from the sides of the drawer with very little effort.
If the adhesive spray made any of the sides or surfaces of the drawer sticky, use fine sandpaper (400 grit) to gently rub it off.
- Heat the iron to a low heat setting - do not use steam. Cut a piece of parchment paper and place it on top of the tissue paper. Then place the iron on top of the parchment paper. Always have the parchment paper between the iron and the tissue paper.
- Start ironing in the center of the drawer and work your way to the sides. The heat of the iron will bond the tissue paper and adhesive to the drawer. If you create any wrinkles, simply go back to the center and push the iron back again over the section. Keep going until the tissue paper is flat against the drawer.
- Allow the surface to cool and the adhesive to dry fully (about 3 hours).
- Use a non-yellowing spray sealer (Aleene’s Acrylic Sealer matte finish) to spray the tissue paper and seal it. Allow sealer to dry.
- If any air pockets have formed, use the same ironing technique to flatten them.
Now the tissue paper drawer liner is sealed! Or for extra waterproofing and protection, use a paintbrush to add coats of non-yellowing varnish (Annie Sloan Chalk Paint Lacquer - clear matte, UV protection).
If you notice the tissue paper starts to wrinkle or bubble up while applying the varnish - don't worry. Allow the wet varnish to dry and the tissue paper will go back to being flat. Thank you, spray sealer!
When all coats are dry, the drawer is ready to be put back in the vanity.
Thank you for watching this video!
Online store: https://www.amazon.com/handmade/hshs
*LIKE* on Facebook: https://www.facebook.com/hobbssuperiorhandmadesupply
Follow on Instagram:
https://www.instagram.com/hellahobbs
Видео How to Decoupage the Inside of Drawer - Line a Drawer with Tissue Paper Tutorial - Easy/Beginner канала Jen Hobbs
Показать
Комментарии отсутствуют
Информация о видео
Другие видео канала
 How to Decoupage. The fastest...the easiest...the BEST!
 What to do with dirty drawers??
 How to line furniture drawers with wrapping paper
 Very Best Tips and Tricks for Decoupage and LIFE! Fix mistakes and minimize wrinkles !
 HOW TO MAKE EASY SILICONE MOLDS
 10 Biggest Furniture Painting Mistakes (and How to Avoid and Fix Them!) - Thrift Diving
 5 DECOUPAGE METHODS / NO WRINKLES OR BUBBLES / BEGINNER TUTORIAL
 Decoupage tutorial - box with pearls
 How to do decoupage with no wrinkles DIY/ Como hacer decoupage sin pliegues/ Decoupage tray
 How to make Heatproof Decoupage Coasters
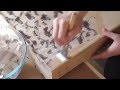 Decoupage three ways - what types of paper can be used?
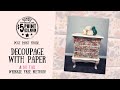 How to Decoupage with NO WRINKLES!
 DECOUPAGE TISSUE HOLDER BOX | SIMPLE DECOUPAGE ON WOOD
 Introducing the NEW Transfer and Decoupage Line!
 Napkin Decoupage + SECRETS of Blending.
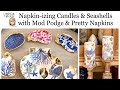 Napkin-izing Seashells and Candles with Mod Podge and Pretty Napkins
 How To Paint Wood Furniture
 Marketplace Antique Dresser Makeover | Salt Wash Finish With Milk Paint and DIY Paint Furniture Flip
 Trash to Treasure ~ Journal Cover using Acrylic Paints ✂️ Maremi's Small Art
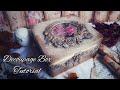 Decoupage box ♡🌹♡Tutorial