
- Популярные видео
- Авто
- Видео-блоги
- ДТП, аварии
- Для маленьких
- Еда, напитки
- Животные
- Закон и право
- Знаменитости
- Игры
- Искусство
- Комедии
- Красота, мода
- Кулинария, рецепты
- Люди
- Мото
- Музыка
- Мультфильмы
- Наука, технологии
- Новости
- Образование
- Политика
- Праздники
- Приколы
- Природа
- Происшествия
- Путешествия
- Развлечения
- Ржач
- Семья
- Сериалы
- Спорт
- Стиль жизни
- ТВ передачи
- Танцы
- Технологии
- Товары
- Ужасы
- Фильмы
- Шоу-бизнес
- Юмор
DaVinci Resolve Tutorial: How to Create a Loading Spinner Animation
Step 1. Right-click in the Media Pool and select New Fusion Composition. Set Duration to 1 second, Frame Rate to 30, and click Create.
Step 2. Double-click the composition to open it on the Fusion page.
Step 3. In the Effects panel, expand Tools and click Shape. Add an Ellipse, Outline node and a Render node to the composition. Connect them to MediaOut.
Step 4. Select the Ellipse node. In the Inspector, change its Width and Height to 0.2.
Step 5. Select the Outline node. Move the playhead to the start. Click the diamond keyframe button next to Position and Length. Set Length to 0 to create a starting keyframe.
Step 6. Move the playhead to the end. Set Position and Length to 1 to create second keyframes.
Step 7. Add a Transform node after the Outline node. Select the Transform node and set Rotation to 90 degrees.
Step 8. Go back to the Edit page. Drag the Fusion composition onto the timeline.
Step 9. Hold down the Alt key and drag the composition to create duplicates of it.
That's it. Thanks for watching. I hope you found this useful.
Видео DaVinci Resolve Tutorial: How to Create a Loading Spinner Animation канала How 2 Wow
Step 2. Double-click the composition to open it on the Fusion page.
Step 3. In the Effects panel, expand Tools and click Shape. Add an Ellipse, Outline node and a Render node to the composition. Connect them to MediaOut.
Step 4. Select the Ellipse node. In the Inspector, change its Width and Height to 0.2.
Step 5. Select the Outline node. Move the playhead to the start. Click the diamond keyframe button next to Position and Length. Set Length to 0 to create a starting keyframe.
Step 6. Move the playhead to the end. Set Position and Length to 1 to create second keyframes.
Step 7. Add a Transform node after the Outline node. Select the Transform node and set Rotation to 90 degrees.
Step 8. Go back to the Edit page. Drag the Fusion composition onto the timeline.
Step 9. Hold down the Alt key and drag the composition to create duplicates of it.
That's it. Thanks for watching. I hope you found this useful.
Видео DaVinci Resolve Tutorial: How to Create a Loading Spinner Animation канала How 2 Wow
Комментарии отсутствуют
Информация о видео
20 июля 2026 г. 4:23:07
00:02:03
Другие видео канала
 Make Any Image Fill a Full Page with Canva's Magic Expand Tool #CanvaTools #DesignTutorial
 Canva Tutorial: How to Create a Floating Effect
 DaVinci Resolve: Two Fast Ways to Crop Your Footage
 How to Key Out Green Screen in DaVinci Resolve 21 | Free Version Workflow #DaVinciResolveTips
 CapCut PC Tutorial: How to Make a Simple Repeated Shake Transition
 How to Clone Video Edits in CapCut PC | Copy & Paste Attributes Tutorial #CapCutEditing #BatchEdit
 CapCut PC Tutorial: How to Blur Part of a Video
 How to Search for Canva Elements by Specific Color | Step-by-Step #CanvaForBeginners #ColorMatching
 DaVinci Resolve: Create a Black and White Look with Saturation Slider
 DaVinci Resolve Free Tutorial: How to Add Motion Blur
 Canva Tutorial: How to Create a Perfect Circle Image Mask with a Grunge Background
 Canva: Circle Image Mask with Grunge Background and Outline
 DaVinci Resolve Tutorial: How to Add an HDR Look Using Color Wheels
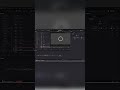 DaVinci Resolve: Animated Loading Spinner with Fusion Composition
 DaVinci Resolve: Quick HDR Effect Using Color Wheels
 DaVinci Resolve Tutorial: How to Highlight Moving Objects Using Tracking and Masks
 DaVinci Resolve Tutorial: How to Create a Time Glitch Effect
 DaVinci Resolve: Quick Fix for Overexposed Clips
 Canva Tutorial: How to Add Grid Lines, Columns, and Rows Using Guides
 DaVinci Resolve Tutorial: How to Fix Overexposed Video
