Tesla Wall Connector Charger - DIY Installation
Showing my Tesla Wall Connector Installation, I was able to do very easily below my panel in my garage. I show unboxing of it, materials I used for my installation and steps involved.
***
Please if you are looking to do this as a DIY, make sure your knowledgeable and comfortable with electrical installations.
If you are not then please consult or hire a licensed electrician in your area!
As well as follow all local electrical codes!
***
The Tesla Wall Connector is your best way to charge your car at home quickly at the maximum rate possible. It can charge as high as 48 amps for model 3 and 56 amps for model S & X that's around a extra 10-14 mph. The travel charger that comes with your car is only capable of 32-40 amps depending on gen version. So if you do a wall connector install 6/2 (55A)wire will be enough for model 3 and 4/2 (70A) SEU copper for S-X. Don't use what I did as it was totally overkill as at the time did not know exactly what was needed, but the charger accepted max 100a service. Specs on charging and what the model 3 was capable of using was really not available so I was making sure I'm future proof as well. The cybertruck will probably have a descreat charger that requires double that of the model 3.
Thanks for Watching and Please like and Subscribe for future videos!
If you find this video helpful in your decision to buy a new Tesla,
Please Use my referral link to receive 1,000 free Supercharger miles with the purchase and delivery of a new Tesla car, or earn a $100 award after system activation by purchasing or subscribing to solar panels: https://ts.la/casey22045
Видео Tesla Wall Connector Charger - DIY Installation канала Tesla Charged
***
Please if you are looking to do this as a DIY, make sure your knowledgeable and comfortable with electrical installations.
If you are not then please consult or hire a licensed electrician in your area!
As well as follow all local electrical codes!
***
The Tesla Wall Connector is your best way to charge your car at home quickly at the maximum rate possible. It can charge as high as 48 amps for model 3 and 56 amps for model S & X that's around a extra 10-14 mph. The travel charger that comes with your car is only capable of 32-40 amps depending on gen version. So if you do a wall connector install 6/2 (55A)wire will be enough for model 3 and 4/2 (70A) SEU copper for S-X. Don't use what I did as it was totally overkill as at the time did not know exactly what was needed, but the charger accepted max 100a service. Specs on charging and what the model 3 was capable of using was really not available so I was making sure I'm future proof as well. The cybertruck will probably have a descreat charger that requires double that of the model 3.
Thanks for Watching and Please like and Subscribe for future videos!
If you find this video helpful in your decision to buy a new Tesla,
Please Use my referral link to receive 1,000 free Supercharger miles with the purchase and delivery of a new Tesla car, or earn a $100 award after system activation by purchasing or subscribing to solar panels: https://ts.la/casey22045
Видео Tesla Wall Connector Charger - DIY Installation канала Tesla Charged
Показать
Комментарии отсутствуют
Информация о видео
Другие видео канала
 Wrecked Tesla Cutting Loose! Full
 Tesla Model 3 - Front Knuckle or Bearing Replacement
 Tesla Model 3 Online bidding
 Petersen Museum - Tesla Exibit - Cybertruck Cyberquad Roadster Semi and More 4K
 Powering up the Flooded Tesla
 Tesla Model 3 - Rear Taillight - Replacement - Water Inside
 Tesla Cybertruck Up Close
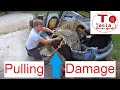 Tesla Model 3 - Pulling Damaged Panels
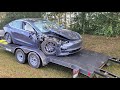 Our Tesla Model 3 was in a accident - The video I never wanted to make!
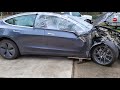 Wrecked Tesla Model 3 - It's going to the IAA Auction!
 Space X - Starbase - Starship - Trip
 Tesla Model 3 - Welding the Side Panel
 Salvaged Tesla model 3 - Picking up the Parts car at IAA auction.
 Tesla Model 3 - We Ripped out all the Glass!
 Project Update - Texas Tesla Ranger
 Tesla Model 3 - Rebuild Update - Panel Welded On!
 My Tesla Model 3 being sold at Auction
 Wrecked Tesla Cutting Loose
 Tesla Model 3 - Getting Parts Car home and checking it out
 Tesla Model 3 - Rebuild 2 - Almost Finished - Getting it Legal
 Wrecked Tesla model 3 - Towed to IAA NO