Beginners Guide to I2C on the Raspberry Pi Pico (BNO055 IMU Example)
This video covers the basics of the I2C communication protocol and how to use it on your Raspberry Pi Pico. We use a Visual Studio Code project to program the brand-new Raspberry Pi Pico microcontroller board in C. We created a project which uses the BNO055 inertial measurement unit (IMU) to read values of acceleration over I2C and print them to a serial monitor over a USB connection to a PC. I realise that I continuously say BNO005 not BNO055 in the video, oops!
This video provides the fundamental background of the I2C communication protocol and explains how to correctly wire an I2C compatible device to the Pico. It explains which functions in the Pico SDK to use in order to communicate with this device. We also cover how to configure the Raspberry Pi Pico correctly in order to enable I2C communication.
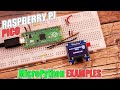
As an example, the BNO055 breakout board from Adafruit is used to demonstrate writing to, and reading from, registers on a peripheral device. This video also shows you where to find the required information in your particular peripheral device’s datasheet in order to get your peripheral device functioning correctly.
The source code for this project (and a written article version coming soon!) is available here: https://learnembeddedsystems.co.uk/bno005-i2c-example-code
BNO055 Breakout board is available at Amazon (Affiliate):
UK: https://amzn.to/2N8dnkn
US: https://amzn.to/3daiye3
SparkFun Article regarding pull up resistors: https://learn.sparkfun.com/tutorials/pull-up-resistors/all
Timestamps
00:00 Introduction
00:48 I2C Basics
02:15 Pico Wiring
03:03 I2C Messages
04:47 Pico SDK I2C Functions
06:00 Read/Write Operations
06:25 Programming Example
16:16 Conclusion
If this video helped you, please consider leaving a like and subscribing, thank you!
To see my other videos on the Raspberry Pi Pico, check out the playlist here: https://www.youtube.com/playlist?list=PLEB5F4gTNK68IlRIJtcJ_2cW4dSdmreTw
You can find more embedded systems tutorials and projects on my website https://learnembeddedsystems.co.uk
-- Equipment I use regularly --
The following links are affiliate links where I may make a small percentage on qualifying sales through these links. Use the respective UK or US links listed.
Budget Soldering Iron: UK: https://amzn.to/3pQpvUu US: https://amzn.to/3bBawIJ
Breadboards: UK: https://amzn.to/3solZCe US: https://amzn.to/3dGsHiS
Jumper Cables: UK: https://amzn.to/37JfToi US: https://amzn.to/3r384S9
Camera: UK: https://amzn.to/3qKLwFr US: https://amzn.to/3pK0V7C
Lens: UK: https://amzn.to/380lQxp US: https://amzn.to/3knH3WL
Tripod: UK: https://amzn.to/37H0Nzw US: https://amzn.to/3byKHsV
All videos and tutorials on this channel and mentioned websites are for educational purposes only.
Видео Beginners Guide to I2C on the Raspberry Pi Pico (BNO055 IMU Example) канала Learn Embedded Systems
This video provides the fundamental background of the I2C communication protocol and explains how to correctly wire an I2C compatible device to the Pico. It explains which functions in the Pico SDK to use in order to communicate with this device. We also cover how to configure the Raspberry Pi Pico correctly in order to enable I2C communication.
As an example, the BNO055 breakout board from Adafruit is used to demonstrate writing to, and reading from, registers on a peripheral device. This video also shows you where to find the required information in your particular peripheral device’s datasheet in order to get your peripheral device functioning correctly.
The source code for this project (and a written article version coming soon!) is available here: https://learnembeddedsystems.co.uk/bno005-i2c-example-code
BNO055 Breakout board is available at Amazon (Affiliate):
UK: https://amzn.to/2N8dnkn
US: https://amzn.to/3daiye3
SparkFun Article regarding pull up resistors: https://learn.sparkfun.com/tutorials/pull-up-resistors/all
Timestamps
00:00 Introduction
00:48 I2C Basics
02:15 Pico Wiring
03:03 I2C Messages
04:47 Pico SDK I2C Functions
06:00 Read/Write Operations
06:25 Programming Example
16:16 Conclusion
If this video helped you, please consider leaving a like and subscribing, thank you!
To see my other videos on the Raspberry Pi Pico, check out the playlist here: https://www.youtube.com/playlist?list=PLEB5F4gTNK68IlRIJtcJ_2cW4dSdmreTw
You can find more embedded systems tutorials and projects on my website https://learnembeddedsystems.co.uk
-- Equipment I use regularly --
The following links are affiliate links where I may make a small percentage on qualifying sales through these links. Use the respective UK or US links listed.
Budget Soldering Iron: UK: https://amzn.to/3pQpvUu US: https://amzn.to/3bBawIJ
Breadboards: UK: https://amzn.to/3solZCe US: https://amzn.to/3dGsHiS
Jumper Cables: UK: https://amzn.to/37JfToi US: https://amzn.to/3r384S9
Camera: UK: https://amzn.to/3qKLwFr US: https://amzn.to/3pK0V7C
Lens: UK: https://amzn.to/380lQxp US: https://amzn.to/3knH3WL
Tripod: UK: https://amzn.to/37H0Nzw US: https://amzn.to/3byKHsV
All videos and tutorials on this channel and mentioned websites are for educational purposes only.
Видео Beginners Guide to I2C on the Raspberry Pi Pico (BNO055 IMU Example) канала Learn Embedded Systems
Показать
Комментарии отсутствуют
Информация о видео
Другие видео канала
 Raspberry Pi PICO | Starting With MicroPython + Examples | I2C OLED, ADC, PWM
 Beginners Guide to SPI on the Raspberry Pi Pico (BMP280 Example)
 LCD Basics for the Pi Pico
 Raspberry Pi Pico: 10 Things You Might Not Know
 CircuitPython with Raspberry Pi Pico - Getting Started
 What is PIO | Programmable I/O on Raspberry Pi Pico
 How to Set Up Visual Studio Code to Program the Pi Pico (Windows)
 Raspberry Pi Pico (RP2040) I2C Example with MicroPython and C/C++ | Digi-Key Electronics
 Raspberry Pi Pico and Arduino Uno chat via I2C
 Talk to Your Pico Over Serial | Raspberry Pi Pico UART Tutorial
 I2C with Arduino and Raspberry Pi - Two Methods
 In-depth: Raspberry Pi Pico's PIO - programmable I/O!
 Raspberry Pi Pico
 Raspberry Pi Pico - DIY Macro Keyboard
 Raspberry Pi Pico - SSD1306 OLED Micro Python Library and Setup
 TinyGo on the Raspberry Pi Pico
 Build Your Own Launchpad for $35 using the Raspberry Pi Pico
 Raspberry Pi Pico Stepper Motors via PIO
 WHICH IS BETTER? Raspberry Pi Pico vs Arduino Nano
 Raspberry Pi Pico - Review and Getting Started