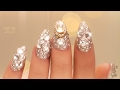
Spring Bling Dip Powder Nails with Gel Top Coat Using Chisel Dipping Powder
Create a spring ombre design with rhinestones and bling using our newest Chisel Dipping Powder colors. Award-winning nail artist David Hoang shows you how to create dipping powder nails. Learn more at http://www.chiselnailarts.com.
Chisel products are available at Princess Nail Supply and major distributors across the US, Canada, the UK and Australia. Contact us to find in your area: https://chiselnailarts.com/faq
Join our discussion on Facebook: https://www.facebook.com/groups/281607206113860
Connect with us on Instagram:
https://www.instagram.com/chiselnailart
#dippowdernails #chiselnailart #dippowder
Here are the steps:
1. Apply #1 Bonder. Apply it around the cuticle area and the entire natural nail bed only.
2. Apply #2 Base. Since we applied a nail tip, there is a ridge between the natural nail and the nail tip. To blend and smooth the ridge, apply a thin layer of #2 Base along the ridge.
3. At a 45-degree angle, dip the nail into the Chisel powder and shake. Repeat for all 5 nails. Brush off the excess powder.
4. For the first colored coat, apply #2 Base to the nail in a thin, even layer.
5. At a 45-degree angle, dip the nail into your Chisel colored powder and shake. Repeat for all 5 nails to let the Base soak into the powder. Brush off the excess powder.
6. For the second color coat, apply #2 Base in a thin and even coat. Make sure you cover the nail evenly, including the sides and tip.
7. At a 45-degree angle, dip the nail into the same Chisel colored powder and shake. Repeat for all 5 nails and brush off the excess powder.
8. With the #2 Base, apply one more coat.
10. At a 45-degree angle, dip the nail into the same Chisel colored powder and shake. Repeat for all 5 nails and brush off the excess powder.
11. Push back the skin on the sides of the nail, then begin filing. File the tip to the desired shape. Push the cuticle back so that when you’re filing, you don’t file into the client’s cuticle. I use an e-file with a diamond bit to clean around the cuticle and file the whole nail, making sure there is enough thickness to hold the length of the nail (be sure not to over-file).
12. Buff the nail in a downward motion.
13. Now you have two options. For clients who don't want to use a gel as a top coat, use Activator on all nails, then take a paper napkin to clean off the top of the nails.
14. Apply the #2 Base on all nails. Let it dry completely before applying a second coat to ensure you have shiny nails. No need for curing.
15. For clients who want bling: apply a no-cleanse gel top coat. This is when you should add your rhinestones, jewels, and all the bling on the nails. Cure for 30 seconds.
16. Apply no-cleanse gel top coat around all your stones. Cure for 90 seconds.
Follow us and let us know what you want to see!
https://www.instagram.com/chiselnailart
https://www.facebook.com/chiselombre
#dippowdernails #chiselnailart #dippowder
Видео Spring Bling Dip Powder Nails with Gel Top Coat Using Chisel Dipping Powder канала David Hoang
Показать
Комментарии отсутствуют
Информация о видео
Другие видео канала
 How to Super-Secure Gems and Bling
 How to create easy Design with Dipping Powder.
 Dip Powder Nails At Home
 Perfect Dip Powder Nails - Tutorial Using Chisel Nail Art Dipping Powder
 DIY NAILS // Dip Powder on Makartt Full Coverage Nail Tips // Featuring Hangry Dips
 Kiara Sky products! Gelly Tips | Dip Powder | do they work together? DIY nails
 Glitter Gradient Tutorial | Using VIVIDip Nails Dip Powder
 Watch Me Work, Dip Powder Nails With Rhinestones. ENG
 Dip Powder Problems!! And how to avoid them!
 DIY Baby Boomer Nails with Dip Powder!
 Rose Gold Dip Nails with Chisel Dipping Powder
 Skip The Extra Steps in Dipping Powders - Do This! 😀
 How To Secure Rhinestone on Nail Applications
 Dip Powder Ombre Nail Tutorial with Chisel Dipping Powder
 DIY Gray Bling Dip Powder Nails At Home | Azure Beauty Amazon
 How to avoid lifting!🙅🏻♀️ Nail Prep for Beginners 💅🏻How to Prep Nails for Acrylic, Gel, and Dip
 DOs & DON’Ts: Gem/Crystal Nails (No Gel)
 Dip Powder Problems part 2: Peel base, application, filing, nailfies, removal, repair, and answers!
 DIP POWDER WITH TIPS | Watch Me Work! | How to create easy designs with Dip Powder |
 Dip Nails Using Regular Acrylic & Tips