How to Fill Holes in Your Car - Correctly (Yes Welding!)
After a quick change of plans, this week's video is devoted to how to fill holes in your car body, 18 of them to be exact. (Some bigger than others).
There are lots of ways to fill holes in your car with some being more temporary than others. The worst way is to patch them with Bondo or fiberglass because fiberglass and steel expand differently with temperatures changes. It may work for a few years and then crackola.
My method is to make nice fitting patches and then Tig weld them to fill the hole. Weld distortion is minimized by stretching the weld area with a hammer and dolly.
This method is time consuming but the only way a professional and permanent result can be obtained.
Makita Sander - https://amzn.to/375tlmr
Strip it Disc - https://rover.ebay.com/rover/1/711-53200-19255-0/1?mpre=https%3A%2F%2Fwww.ebay.com%2Fitm%2FScotch-Brite-Coating-Removal-Disc-7-in-x-NH-S-XCS-Bulk%2F254322762678%3Fepid%3D1000949182%26hash%3Ditem3b36d163b6%3Ag%3AWTgAAOSwE21dSdUl&campid=5338270888&toolid=20008
TIG Welder: https://amzn.to/3yxtbzR
00:00 TIG Weld Holes In Car
00:31 Strip paint with strip it disc
00:59 Use long spoon dolly on backside to stretch weld
01:31 Weld small mirror holes with MIG
02:22 Grind weld beads down with cutoff tool
03:04 Cutoff tool generates less heat than angle grinder when finishing welds
03:47 Use Roloc disc to smooth weld bead
04:16 Weld windshield washer holes on Porsche 911 cowl
05:15 Check distortion of weld area with straight edge
06:09 Fill gas tank filler neck hole
06:57 Remove paint from filler neck area
07:41 Remove left front fender for better access
08:10 Prep inside of fender for clean TIG weld
08:21 Trace trim line on patch panel using DYKEM
08:51 Near zero patch panel gap for TIG Welding
09:42 Hammer on dolly welds as you go to prevent heat distortion
11:38 Close up of plannished TIG weld
12:41 Shave antenna hole Porsche 911
13:20 Double layer construction of Porsche 911 fender
14:15 Use tape to hole hole patch plug prior to TIG weld tack
14:44 Pre-stretch hole edge prior to weld
15:23 Use straight edge to see heat distortion
16:50 Stretch hole outward with eye bolt
17:07 Weld rocker holes with MIG
This video series filmed in my home workshop highlights the technical details of my classic car restoration (An aircooled Porsche 911). I’m starting with a stripped out shell from 1974 and backdating it to the earlier longhood look. (Backdated Porsche means to make it look older than it is). It’s not easy to build a car in a small garage but I hope to inspire other gearhead minded people like me to build something cool with DIY style.
In the first few episodes I will focus on the autobody metalwork to transform this junker into something fun to drive. Extensive metal fabrication is needed to give the body the wide and low stance that I'm looking for. Metal fab can be time consuming but its the detail that set each car project build apart from the rest. My classic Porsche strives to be unique with custom hotrod touches throughout. There will be some rust repair in the front trunk area including the infamous suspension pan...home fab style.
I plan to update weekly videos detailing the customization of my classic sports car. This is a low budget build so I plan to make many of the custom parts myself wherever possible. I hope you enjoy my car vlog that will hopefully become an autocross racer or track car someday.
Engine plans are 3.0L+ with individual throttle bodies ITB
Custom brakes and suspensions mods are also planned.
Please stay tuned for all updates on this project series.
Product and tools info at www.ahhgaragetime.com
My Classic Car Restoration Future Plans
I plan to modify the suspension and brakes with improved aftermarket parts from Elephant Racing and Tarett Engineering as money and time allows. Larger brakes from a late model Boxster will be used since this car didn’t come with any brakes and they seem to be the best bang for the buck. The engine will be from a later Porsche 911 to with at least 3.0 liters and I hope to use a custom individual throttle bodies with a modern injection system and software.
In other words, this build will be a mashup of all Porsche’s best years. The classic look of the early lightweight body with a more modern air-cooled drivetrain. Call it a restomod or hotrod if you like, but I’m going to make it my own with custom touches along the way. Please join me in this detailed restoration journey.
Porsche...there is no substitute
Visit my website at www.ahhgaragetime.com or
facebook at www.facebook.com/ahhgaragetime
Instagram at www.instagram.com/ahhgaragetime
Видео How to Fill Holes in Your Car - Correctly (Yes Welding!) канала Garage Time - DIY Porsche Restoration
Показать
Комментарии отсутствуют
Информация о видео
29 июля 2018 г. 7:58:05
00:21:19
Другие видео канала
 Hole repair without welding
 Firewall Shaving Tips & Tricks - How To on the C10 Build!
 Tips and tricks for filling holes in sheet metal, like old trim holes.
 How to PROPERLY Repair a Rust Hole in your Car or Truck (DIY for Beginners)
 Filling Holes in Sheet Metal EASY with This Simple Tool YOU Can Make!!
 How To Weld small holes the easy way
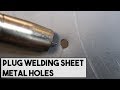 HOW TO PLUG WELD HOLES IN AUTO BODY PANELS
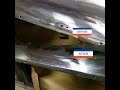 How to repair rust holes in 15 minutes
 Smoothing the firewall of an old truck
 How To Conquer The HIGHS & LOWS of Car Restoration
 How To Lead: Leading a Body Panel with Gene Winfield - Using Body Solder Kit from Eastwood
 How to Plug Weld Auto Body Sheet Metal & Prevent Pinch Weld Rust
 How To Fix Rust Holes In Your Car The Right Way
 Klutch Welding table upgrade DIY
 How to patch up holes in body panels
 Fiberglass Repair for Bullet Holes!!!-No Welding
 1969 GMC Firewall patch panel fabrication and installation
 TFS: How to Bridge Gaps and Holes on Thin Metal
 CRUSHED Oil Line Repair Goes From Easy to Difficult Real Fast - Porsche 911
 How to set up your mig welder for sheet metal