How to Build a CHEAP FENCE
Hose clamp: https://amzn.to/2MBO05f
Steel wire: https://amzn.to/2tlYxZE
Angle grinder: https://amzn.to/2ME9635
On the previous episode I gave an overview of my land and how I prepared it for planting. The next step was to build a fence. I was looking for the absolute cheapest way to put a fence up to keep the deer out of my yard. Without a fence the deer would eat everything and leave nothing for me. I started by buying 45 2” pencil post fence posts that are 7 feet long. I identified my property line and started pounding in posts with sledgehammer standing on top of a ladder. This method worked but it wasn’t the safest way to get the posts in the ground. If you’re going to do this yourself wait until it rains before putting the posts in the ground otherwise the ground will be too hard.
I started each post by rotating them will pulling down to get a small hole to hold the post in place, I hit each post a few times then would jump off the ladder to check if it was straight then pounded it down until it was close to its final height. After all the posts were in I went back and tapped each one to try to get the heights to match up to be the same. When spacing the posts I used a post or 7 feet at my measuring tool to space them out. I had to pull some of the posts out and redo them to work around a gas line and sewer cleanout in my backyard. After I had a yard full of posts it was time to roll the wire mesh out. I was super lucky to get 2 rolls of wire fencing from my neighbour saving me $400 - $500. A similar but cheaper alternative to the galvanized fencing is metal farm fencing which isn’t as durable but will keep deer out. My neighbour helped me roll out and attach the first roll of fencing on my front yard. I’d recommend getting someone to help you do this as these rolls of fencing weight well over 200 lbs. For the backyard I didn’t ask for help and we determined to do it myself. I used a strap from my olympic rings as a way to get leverage on the roll. Initially I tried rolling it out while it was standing but it too far too much effort to move the roll. I ended up tipping it over and rolling it across the ground until I got to the corner. I decided to cut the roll here has there would be a weird pinch on the fence as it goes down the back alley as there is a decent downwards slope. I propped up the fence off the ground with a log then used an angle grinder to cut the fence. I should note here you can’t cut this fence with tin snips, I tried it took me 15 minutes to cut through 1 bar then I went out and bought the angle grinder.
With the fence being cut I was able to throw it up against the poles and zip tie the posts and fence together. After the fence was secured with zip ties I went back and used hose clamps around both to keep them held together tight. After I ran out of hose clamps I secured the last few with steel wire, both will be linked down below. I rolled out the next section, attached it and did so on the back of the property. After the fence was up I cut a hole in the fence in the front yard so I can still get my mail. This footage here of me cutting my fence is my first time using an angle grinder, I didn’t have a face shield so I just improvised with my biking goggles, medical mask and torque to protect against the sparks. After it was cut free I used pliers to bend any of the sharp metal bits towards the post.
Next on my journey of building a food forest in my yard is the construction of the gates and installing deer fencing on top of the fence.
ion
Видео How to Build a CHEAP FENCE канала Earth Monkey
Показать
Комментарии отсутствуют
Информация о видео
Другие видео канала
 Ice Cream Bean | Fruits You've Never Heard Of
 Weight Loss | How to Light Your Soul on Fire
 How to Create a Hugelkultur Garden Bed
 4 Ingredient Weight Loss Cabbage Chips
 Morning Runs Will Change Your Life | Mindset of a Champion
 Top 5 Health Benefits of Turmeric
 Black Kabuli Chickpea Taste Test | Unusual Foods
 Hacked! $18,000 Stolen | How You Can Protect Yourself
 3 Ingredient Kabocha Squash Pudding
 Groundcone Taste Test | Unusual Foods
 Thai Banana | Fruits You've Never Heard Of
 Ozark White Eggplant Taste Test
 How To Organize Spices
 3 Essential Vegetable Juice Ingredients
 Giant Yellow Mulberry (Myrianthus arboreus) | Fruits You've Never Heard Of
 Apple Cilantro Salad Recipe
 Maldives Melon Taste Test | Unusual Foods
 Top 3 Ways To Cure Back Pain
 Sriracha Taste Test | Unusual Foods
 Broad Bean Growing,Taste Test | Unusual Foods
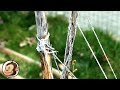 How to Stake and Support a Fruit Tree