Fire Pit Cover | Build It | Ask This Old House
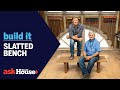
Ask This Old House general contractor Tom Silva works with host Kevin O’Connor to build a cover that can turn a store bought fire pit into a table when not in use.
SUBSCRIBE to This Old House: http://bit.ly/SubscribeThisOldHouse
Time: 4 hours
Cost: $100
Skill Level: Moderate
Tools List for Building a Fire Pit:
Miter Saw
Table Saw
Power Sander
Drill
Router
Tape Measure
Clamps
Shopping List:
5/4 x 6 Ipe decking
Exterior Wood Glue
Straight Cutting Router Bit
Round Over Router Bit
Steps:
1. Ipe decking is expensive, so to maximize the yield, set the fire pit down on the board. Leave a 1 1/2” overhang on each side of the firepit, mark and cut that length on the miter saw.
2. Continue that process for each board until the entire fire pit is covered.
3. Run each board through the table saw twice (once per side) to make the tapered side of the decking flat.
4. Glue the boards together using exterior wood glue. Clamp the assembly together while the glue sets, using a center line on each board as a reference to keep everything aligned. Wipe excess glue that oozes from the joints with a wet rag before it cures.
5. After the glue has set, use a sander to smooth out the high spots.
6. Locate the center of the top by measuring diagonally and marking the center of that dimension, and then marking the center of the board. Drill a small pilot hole at that center mark.
7. Use a scrap piece of wood as a jig. Set a screw at one end of the board, then determine the overall radius of the piece and drill a hole at that length on the jig. The hole on the jig should be sized to accept the collet from the router.
8. Set the screw on the jig into the center hole of the top. This will allow the router to swing at the desired radius and make a smooth cut around the entire top. Make several passes with the router, getting progressively deeper each time.
9. Move the screw on the jig in about 1 1/4” and screw the jig to the center hole again.
10. Cut a shallow kerf using the router and jig to break surface tension from rain.
11. Use a round over bit in the router to ease the top and bottom edges of the cover.
12. Use scrap ipe to create two cleats that run perpendicular to the decking. Drill the screws oversize so the top can expand and contract.
Resources:
All of the tools used can be found at the local home center or carpentry supply store.
The wood used for the fire pit cover was ipe decking—also known as Brazilian walnut, one of the densest hardwoods out there. Ipe can be found at the local decking supply distributor.
Build It:
This Old House general contractor Tom Silva, This Old House host Kevin O’Connor, and special guests including Jimmy DiResta, take you through step-by-step DIY projects in this popular video series. From end-tables to cutting boards to wine racks to chicken coops and more, learn how to build from the best pros in the game. Segments include mention of all tools and materials needed to get the job done.
Looking for more step by step guidance on how to complete projects around the house? Join This Old House Insider to stream over 1,000 episodes commercial-free.
https://bit.ly/2GPiYbH
Plus, download our app for streaming full episodes to your connected TV, phone or tablet:
https://bit.ly/34RYEP5
Follow This Old House and Ask This Old House:
Facebook: http://bit.ly/ThisOldHouseFB
Twitter: http://bit.ly/ThisOldHouseTwitter
http://bit.ly/AskTOHTwitter
Pinterest: http://bit.ly/ThisOldHousePinterest
Instagram: http://bit.ly/ThisOldHouseIG
For more on This Old House and Ask This Old House, visit us at: http://bit.ly/ThisOldHouseWebsite
Fire Pit Cover | Build It | Ask This Old House
https://www.youtube.com/user/thisoldhouse/
Видео Fire Pit Cover | Build It | Ask This Old House канала This Old House
Показать
Комментарии отсутствуют
Информация о видео
Другие видео канала
 Modern Platform Bench | Build It | Ask This Old House

 DiY Wood Fire Pit Table - build it yourself! Modular, Solid Wood
 Smokeless Burn Barrel
 How to Install a Solid-Wood Exterior Door | Ask This Old House
 DIY Fire Pit Cover | ONLY 4 CUTS | Quick Easy Cheap Modern | One hour
 End Grain Cutting Board from Scrap Wood | Build It | Ask This Old House
 Rough Sawn Headboard | Build It | Ask This Old House
 How to Build Custom Concrete Countertops | Ask This Old House
 Live Edge Slab Table | Build It | Ask This Old House
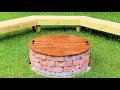 How to Build a Fire Pit Table Top
 How to Build a Tool Storage Cabinet | This Old House
 How To Edge Plywood - You've been doing it WRONG !
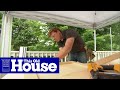 How to Build a Laminate Counter | This Old House
 Simple Side Table | Build It | Ask This Old House
 STOP Wasting your FireWood ASH! LEARN what we use it for...
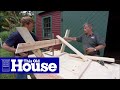 How to Build A Picnic Table | This Old House
 Best Portable Job Site Table Saw - Head-2-Head
 Rustic Dining Table with Jimmy DiResta | Build It | Ask This Old House