- Популярные видео
- Авто
- Видео-блоги
- ДТП, аварии
- Для маленьких
- Еда, напитки
- Животные
- Закон и право
- Знаменитости
- Игры
- Искусство
- Комедии
- Красота, мода
- Кулинария, рецепты
- Люди
- Мото
- Музыка
- Мультфильмы
- Наука, технологии
- Новости
- Образование
- Политика
- Праздники
- Приколы
- Природа
- Происшествия
- Путешествия
- Развлечения
- Ржач
- Семья
- Сериалы
- Спорт
- Стиль жизни
- ТВ передачи
- Танцы
- Технологии
- Товары
- Ужасы
- Фильмы
- Шоу-бизнес
- Юмор
Large DIY 3D printer 3 - calibration and printing
Doing some calibrations and largish test prints on the finished printer. It's working great!
Update: consider probing just 3 points during the z-tilt. Probing 4 point might give unpredictable results.
Testprint, the sub: https://www.printables.com/model/756897-submarine
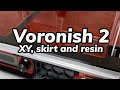
Voronish 1: https://www.youtube.com/playlist?list=PLHk1C7nPAl804AaKE_XwfZFxv7xstoq0u
Please note that this is a low budget build. I am not using the best components available. (by far). I am using whatever I already have or can get hold of as cheap as possible. I consider this printer a prototype/PoC.
I followed up this PoC build with the new and improved RIFF 600/900 design. The cad for that version is available.
Some facts about the build:
• Filament: Isanmate ASA (black), Fiberlogy ABS (light green) and SUNLU PETG (black)
• Build plate 300 x 900 (300x820 usable)
• 2020 and 2040 alu extrusions
• SKR 1.4 turbo and SKR Pico controllerboards
• Radxa Rock 3C SBC
• MGN 12H rails/carriage on Y and X
• 12mm rods and bearings on Z
• Cartesian
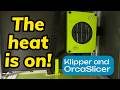
• Klipper
• Sensorless homing on X and Y
• Dual Y stepper motors/drivers
• Stealthburner
• 3 x 360W power supplies
• Dual mains switches/fuses
Timestamps:
00:00 Trollolo
00:18 Clarifications
00:57 Basic calibrations
02:03 Input shaper
04:41 Graphs
04:50 Printing for the Voronish1
06:24 Printing a large frame
06:54 The 16h sub
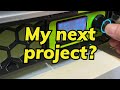
08:38 Next project?
#largeprinter #3dprint #DIY
Видео Large DIY 3D printer 3 - calibration and printing канала V4 projects
Update: consider probing just 3 points during the z-tilt. Probing 4 point might give unpredictable results.
Testprint, the sub: https://www.printables.com/model/756897-submarine
Voronish 1: https://www.youtube.com/playlist?list=PLHk1C7nPAl804AaKE_XwfZFxv7xstoq0u
Please note that this is a low budget build. I am not using the best components available. (by far). I am using whatever I already have or can get hold of as cheap as possible. I consider this printer a prototype/PoC.
I followed up this PoC build with the new and improved RIFF 600/900 design. The cad for that version is available.
Some facts about the build:
• Filament: Isanmate ASA (black), Fiberlogy ABS (light green) and SUNLU PETG (black)
• Build plate 300 x 900 (300x820 usable)
• 2020 and 2040 alu extrusions
• SKR 1.4 turbo and SKR Pico controllerboards
• Radxa Rock 3C SBC
• MGN 12H rails/carriage on Y and X
• 12mm rods and bearings on Z
• Cartesian
• Klipper
• Sensorless homing on X and Y
• Dual Y stepper motors/drivers
• Stealthburner
• 3 x 360W power supplies
• Dual mains switches/fuses
Timestamps:
00:00 Trollolo
00:18 Clarifications
00:57 Basic calibrations
02:03 Input shaper
04:41 Graphs
04:50 Printing for the Voronish1
06:24 Printing a large frame
06:54 The 16h sub
08:38 Next project?
#largeprinter #3dprint #DIY
Видео Large DIY 3D printer 3 - calibration and printing канала V4 projects
Комментарии отсутствуют
Информация о видео
23 апреля 2025 г. 1:16:45
00:09:06
Другие видео канала