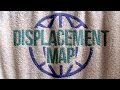
How to Use Displacement Maps in Photoshop
I Guarantee I Can Teach You to Master Photoshop. Learn How: https://phlearn.com/aaronwillteachyou
Learn how to use displacement maps in today's episode and help this rad granny out by adding the Phlearn logo to her hat!
You will need two elements for this technique:
-Logo or some sort of design
-Image to place the design on
To start, transform your logo onto the image. You can hold Cntl/Cmd + T, right click, and select Warp to really hone in on the correct angles and perspective. Next, go to Channels and find the one that has the most contrast (this is often the blue). Then, right click on that channel. Select New under the Document Menu. Title it appropriately and hit OK. Now, go to File - Save As, and save it as a PSD. This document is now your displacement map.
Back to the original image we go! Select RGB in the Channels tab so that all of them are selected. Now, go back to the layer tab. While on your logo layer, go to Filter - Distort - Displace. Set the horizontal and vertical scale to 10. It will ask you to load your displacement map, which is the other document that we just saved out. It will automatically start to integrate the texture into the logo!
Amazing quick tip: If you press the logo above the layers next to the word "Lock," anything you do will ONLY affect the pixels on that layer. You can think of it as a mask for your logo! This is called Locking the Transparency.
Feel free to play around! Try filling the logo with a color and then experimenting with blend modes. In this case, we chose to use Overlay.
Website: http://phlearn.com
Facebook: https://www.facebook.com/Phlearn
Google+: https://plus.google.com/u/0/116791098...
Видео How to Use Displacement Maps in Photoshop канала PHLEARN
Показать
Комментарии отсутствуют
Информация о видео
Другие видео канала
 Photoshop Tutorial: Wrap Text & Graphics onto Complex Surfaces with Displacement Maps
 How to Conform Text to a Surface Using a Displacement Map in Photoshop
 How to Use Vector Masks in Photoshop
 The Most Realistic Way to Swap Head in Photoshop!
 Gradients vs Gradient Maps
 Turn Your Signature Into a Watermark in Photoshop!
 Blend if - Powerful Photoshop Tool Finally Explained Easily
 How to Change Clothing Texture using Displacement map in Photoshop
 How To Use The Displace Filter In Photoshop - Displacement Maps
 Sélection par les couches de couleurs avec Photoshop
 Photoshop Blending Modes Explained
 How to Use Displacement Maps: Part 1
 The Hidden "3D Contrast" in Photoshop!
 Make GREAT Selections with CHANNELS in Photoshop
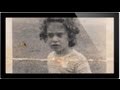 How To Repair An Old Photo In Photoshop Pt 2 - A Phlearn Video Tutorial
 Maya at a Glance: Bump map, Normal Maps and Displacement maps in Arnold
 How to Set Up and Use a Wacom Tablet
 How to Remove Logos from Clothing in Photoshop
 How to Create Transparent Logos in Photoshop | Logo Design Tutorial