- Популярные видео
- Авто
- Видео-блоги
- ДТП, аварии
- Для маленьких
- Еда, напитки
- Животные
- Закон и право
- Знаменитости
- Игры
- Искусство
- Комедии
- Красота, мода
- Кулинария, рецепты
- Люди
- Мото
- Музыка
- Мультфильмы
- Наука, технологии
- Новости
- Образование
- Политика
- Праздники
- Приколы
- Природа
- Происшествия
- Путешествия
- Развлечения
- Ржач
- Семья
- Сериалы
- Спорт
- Стиль жизни
- ТВ передачи
- Танцы
- Технологии
- Товары
- Ужасы
- Фильмы
- Шоу-бизнес
- Юмор
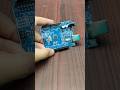
Touchless Door Bell Arduino Tinkercad
Creating a touchless doorbell using Arduino on Tinkercad is an interesting project. Here's a basic outline of how you can set it up:
Project Link - https://www.tinkercad.com/things/kHwmP4phJCC-sizzling-bojo/editel?returnTo=%2Fdashboard%3Ftype%3Dcircuits%26collection%3Ddesigns&sharecode=7MZEQ90A4hE73j2Smq8KnY4Q8ByzNKDLEzpjaYIlW7U
Components Needed:
Arduino board (e.g., Arduino Uno)
PIR Motion Sensor
Passive buzzer
Jumper wires
Breadboard (optional)
Steps:
Set Up the Circuit:
Open Tinkercad and create a new circuit.
Place the Arduino board and the ultrasonic sensor on the workspace.
Connect the VCC and GND pins of the ultrasonic sensor to the 5V and GND pins of the Arduino, respectively.
Connect the Trig pin of the ultrasonic sensor to a digital pin (e.g., pin 7) on the Arduino.
Connect the Echo pin of the ultrasonic sensor to another digital pin (e.g., pin 6) on the Arduino.
Connect the positive (+) terminal of the passive buzzer to a digital pin (e.g., pin 8) on the Arduino.
Connect the negative (-) terminal of the passive buzzer to the GND pin of the Arduino.
Видео Touchless Door Bell Arduino Tinkercad канала EAZYTRONIC
Комментарии отсутствуют
Информация о видео
13 марта 2024 г. 18:30:00
00:05:12
Другие видео канала