How to repair and reinforce large ABS plastic items using ABS slurry.
In this video, I show you how I repaired and reinforced a large item made out of ABS plastic by painting on several layers of liquid ABS plastic 'slurry'. I repaired several large cracks and strengthened weak areas in the ABS plastic roof of our hardshell roof top tent, and I'm really happy with the results. The rooftop tent no longer leaks and we should get plenty more use out of it. The total cost of the repair was around $65 AUD.
I did a lot of research prior to performing these repairs, and a lot of people suggest fibreglass, but apparently fibreglass doesn't adhere to ABS very well so I was reluctant to use it. I figured that by making a thick ABS slurry and painting on several layers, allowing drying time between layers, it would add thickness and strength to the original plastic, not to mention seal up the existing cracks. The ABS slurry also has really good adhesion to the original plastic.
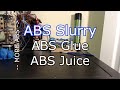
To make this ABS slurry, I used a ratio of 50 grams of ABS plastic to 125ml acetone and mixed them together in a sealed glass jar and left for 24 hours. To get the right amount of ABS pieces I used a 600x45x2mm ABS sheet and cut/broke it into small pieces, which equaled roughly 50 grams. I bought the 2mm ABS sheet off ebay for around $25AUD delivered, or they are generally available at most hobby stores.
02:15 ABS slurry being applied
If this video has helped you please give it a thumbs up, any questions please post in the comments. Cheers!
Видео How to repair and reinforce large ABS plastic items using ABS slurry. канала For The Love of Video
I did a lot of research prior to performing these repairs, and a lot of people suggest fibreglass, but apparently fibreglass doesn't adhere to ABS very well so I was reluctant to use it. I figured that by making a thick ABS slurry and painting on several layers, allowing drying time between layers, it would add thickness and strength to the original plastic, not to mention seal up the existing cracks. The ABS slurry also has really good adhesion to the original plastic.
To make this ABS slurry, I used a ratio of 50 grams of ABS plastic to 125ml acetone and mixed them together in a sealed glass jar and left for 24 hours. To get the right amount of ABS pieces I used a 600x45x2mm ABS sheet and cut/broke it into small pieces, which equaled roughly 50 grams. I bought the 2mm ABS sheet off ebay for around $25AUD delivered, or they are generally available at most hobby stores.
02:15 ABS slurry being applied
If this video has helped you please give it a thumbs up, any questions please post in the comments. Cheers!
Видео How to repair and reinforce large ABS plastic items using ABS slurry. канала For The Love of Video
Показать
Комментарии отсутствуют
Информация о видео
Другие видео канала
 How to easily make ABS Slurry (aka ABS Juice and Glue)
 How to Easily Fix Cracks by Plastic Welding!
 How to repair cracked and broken plastic on your motorcycle bodywork
 Plastic Welding. Repairing ABS car interior plastics. Jaguar XK8 or XKR
 Things you should know about ABS
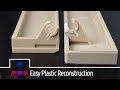 Easy Plastic Reconstruction and Repair
 mold making and injection process
 Which Epoxy is Best for Plastic? Let's find out!
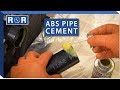 How to Glue ABS Pipe Together | Repair and Replace
 PLASTI-HAIR - BUMPER HOLE REPAIR IN 30 MINUTES
 Introducing Easy ABS Repair
 Using Super Glue and Baking Soda to Repair a Plastic Switch Plunger
 How I Taught Myself to Plastic Weld
 Bumper Repair with Hot Air Plastic Welder
 Making ABS Juice, Glue & Slurry | Tutorial | Dream 3D
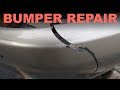 DIY Bumper Crack Repair
 Plastic Identification... What Can Be Welded? What Can't?
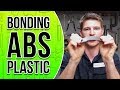 How to Bond ABS Plastic Together | How to Repair ABS Plastic Easy | Automotive Repair Techniques
 Delboy's Garage, Simple skills # Plastic welding
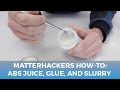 MatterHackers How-To: ABS Juice, Glue, and Slurry