Polymer Clay Witch - Halloween Tutorial || Maive Ferrando
Hi guys! I apologize for the the delay in posting a Halloween tutorial, but I had to gather the materials and some took ages to arrive. I still hope you'll find it useful, even if it's too late for a Halloween creation, maybe you can get some ideas for similar future projects.
I hope you all have a creepy Halloween!
Love,
Maive X
PS: I'm sorry that you can't always see what I'm doing because of the angle of the camera, but it's very hard to film.
BUY MY PIECES HERE:
🍓 Website & Shop: https://www.maiveferrando.com/
🍓 You can share your recreations with me using #maiveferrando on Instagram or other social media sites, I love to see what you guys make following my tutorials!
🍓 If you're new to my channel make sure you subscribe and click on the "bell" button for more videos every week and if you liked this video, why not give it a thumbs up and share the love?
🍓 Have a request for upcoming tutorials? Let me know in the comments!
FOLLOW ME!
🍓 Subscribe to my website for updates: www.maiveferrando.com
🍓 Second Channel: https://www.youtube.com/channel/UCpgSKm_hj6emUN9sMuv6Y_A
🍓 Instagram: https://www.instagram.com/maiveferrando/
🍓 Facebook: https://www.facebook.com/glossyapple
🍓 Twitter: https://twitter.com/MaiveFerrando
Materials used in this video:
Skeleton/base of the witch:
- Wire
- Tin foil
- Sculpey Ultra Light Polymer clay
You don't need to make an armature, I did it because I wanted to, because I like to expermient and to have an idea of what the pose was going to be, as I don't sketch things out first. You can easily make a base entirely of polymer clay and then attach the arms and head.
The Rest:
- Polymer clay in Sculpey Living Doll (beige), white mixed with a bit of yellow and transluscent for the eyes (I prebaked the eyes for 10 minutes and bonded them with liquid clay)
- Acrylic paints (or any other water based paints. You can also add colour using pastels)
- Fabrics: Bandage. Black fabric. I used what I had, so have a look around the house first and check for old shirts, jumpers, or anything you thought of throwing away or that don't fit or that you simply don't like anymore.
- UHU universal glue.
- PVA glue.
- I added a few stitches here and there to add strength. If you can sew or someone in your family can, the better!
- Always bake your clay according to manufacturer's instructions. Recommended temperature: Not more than 130ºC (some clays 110ºC). Recommended time: Not more than 30'.
Music: "Volatile Reaction", "The escalation" and "Drums of the Deep" all by Kevin MacLeod at www.incompetech.com
Licensed under Creative Commons: By Attribution 3.0
http://creativecommons.org/licenses/by/3.0/
Sound effects: "Maniacal Witches Laugh" from www.soundbible.com
Видео Polymer Clay Witch - Halloween Tutorial || Maive Ferrando канала Maive Ferrando
Показать
Комментарии отсутствуют
Информация о видео
Другие видео канала
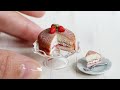 Miniature Victoria Sponge Cake & Giveaway | Maive Ferrando
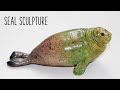 Polymer Clay Seal Sculpture for the Cornish Seal Sanctuary | Maive Ferrando
 Trying Out DAS Smart Polymer Clay || Maive Ferrando
 Basic Polymer Clay Shapes All Beginners Should Know || Maive Ferrando
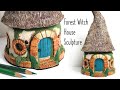 Fantasy Forest Witch House - Polymer Clay Sculpture on Glass Jar || Maive Ferrando
 Polymer Clay Fairy House Part I : SCULPTING PROCESS || Maive Ferrando
 Polymer Clay Orca Sculpture Process || Maive Ferrando
 Miniature Polymer Clay Taiyaki Cakes || Maive Ferrando
 Polymer Clay Book + More Exciting News! || Maive Ferrando
 Handmade With Blood: Polymer Clay Haunted House, Recycled Glass Jar || Maive Ferrando
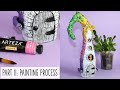 Polymer Clay Fairy House Part II: PAINTING Process using ARTEZA Acrylic Paints || Maive Ferrando