UTV MX MaxPow™ Ranger 3 12v Electric Kids Ride On Car Assembly Instructions
If you're looking for instructions to build your RiiRoo UTV MX MaxPow™ Ranger 3 Kids Electric Ride On Car, then check this out!
RESOURCES & LINKS:
____________________________________________
For more info on this car, visit - https://riiroo.com/products/12v-battery-electric-utv-mx-maxpow-ranger-3
Take a look at our promotional video -
Our ride-on cars - https://riiroo.com/collections/ride-on-cars-and-jeeps
Our ride on motorbikes - https://riiroo.com/collections/electric-motorbikes
Our ride-on scooters - https://riiroo.com/collections/riiroo-scooters
____________________________________________
1. Take a look at the parts list and ensure you have all the items to build.
2. Please refer to the parts list in the manual.
3. Protect and place the car on a flat surface.
4. Remove the cable tie from the motor.
5. Remove the nuts & bolts as shown.
6. Secure the rear bracket to the springs with nut & bolt.
7. Repeat process on the other side.
8. Insert the axle through the holes in the suspension mechanism.
9. Line up the motor with the axel and the hole in the body of the car.
10. For the rear wheels, ensure the assembly order of the hardware is as follows - wheel - washer - & finally the nut.
11. Repeat process on the other side.
12. Attach the rear wheel to the relative gaps on the wheel.
13. Repeat process on the other side.
14. Disassemble the front suspension.
15. Repeat process on the other side.
16. Disassemble the front suspension.
17. Line up the steering rack with the steering rod.
18. Reassemble the front suspension as shown.
19. Repeat process on the other side.
20. Secure the steering rod with a washer & split pin.
21. For the front wheels, ensure the assembly order of the hardware is as follows - wheel - washer - & finally the nut.
22. Attach the front wheel to the relative gaps on the wheel.
23. Repeat process on the other side.
24. Connect the steering wheel wire to the multiplug, protruding from the steering console.
25. Ensure the wire is threaded back through the console once connected to prevent damage.
26. Ensure the steering wheel is lined up with the hole on the steering rod.
27. Secure the steering wheel with the nut & bolt that was previously removed.
28. Secure the steering rod with the nut & bolt that was previously removed.
29. Connect the battery terminal multi-plug.
30. Once the battery terminals are connected, check to see if the car powers up.
31. Attach the front bonnet as shown.
32. Attach the front roll bar by pushing it into place firmly.
33. Secure it with the screws.
34. Repeat process on the other side.
35. Attach the rear roll bar by pushing firmly into place.
36. Slide seat onto the brackets.
► If you need help choosing a ride-on toy for a present, then check us out @ https://riiroo.com/
►Subscribe: http://bit.ly/RiiRooSubscribe to see more videos on our ride-on toys.
►Find us on Facebook: https://www.facebook.com/riirooltd/
#utvmx #utv-mx utv #mx2000new
Видео UTV MX MaxPow™ Ranger 3 12v Electric Kids Ride On Car Assembly Instructions канала RiiRoo
Показать
Комментарии отсутствуют
Информация о видео
Другие видео канала
 How To Attach The Steering Wheel On The Fiat 500 Kids Ride on Car
 Mercedes G65 AMG Licensed 12v Battery Electric Ride On Car For Kids With Parental Remote Control
 Buggati Chiron Licensed 12v Battery Electric Ride On Car For Kids With Parental Remote Control
 BMW M6 Coupe Style Kids Ride on Car Shorts Promo
 Yamaha R6 Style Ride On Motorbike 6v Kids Electric Ride On Bike Info & Assembly Instructions
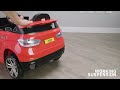 BMW X5 Inspired CityBeam Kids Electric Ride On Car
 How To Attach The Steering Wheel On The Mercedes Benz ML350 4Matic
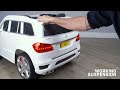 Mercedes Benz GL63 Kids 12V Battery Electric Ride On Car For Kids
 Mercedes Benz G63 6 x 6 with Adult Seat 12v Electric Ride On Car For Kids With Parental Remote
 Range Rover Evoque Style Kids Electric Ride On Car
 How To Assemble The Light Bar On The Jeep Wrangler Rubicon Kids Ride on Car
 Top 5 RiiRoo Kids 4 Wheel Drive Ride On Cars
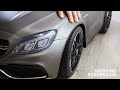 Mercedes C63 AMG Kids 12V Battery Electric Ride On Car
 How To Attach The Wheels On The BMW X6M Kids Ride on Car
 How To Attach The Wheels On The RiiRoo Police Pursuit Kids Ride On Car
 Toyota Hilux Ruggedx 12v Battery Electric Ride-on Car
 Polaris Ranger Style ATV6 24v Battery Electric Ride On Car For Kids
 How To Attach The Wheels On The Audi R8 2020 Kids Ride on Car
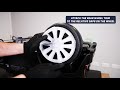 How To Attach The Wheels On The Mercedes Benz G500 Kids Ride on Car
 How To Attach The Front Wheel & Fairing On The Yamaha R6 Style Kids Ride on Motorbike
 BMW X6M Kids 12V Battery Electric Ride On Car For Kids