Making Gelli Plates for Printmaking
In this video, I will demonstrate how to make "gelli plates" at home, used for printmaking. Here is my recipe:
Gelatin Printing Plate (hectograph) Recipe
Ingredients:
-1 ½ cups of liquid glycerin
-1 cup of powdered gelatin (e.g. Knox - gelatin is not vegan*) OR agar agar powder (vegan)
-1 ½ cup rapidly boiling water
Utensils and Tools:
-Large mixing bowl (microwave safe)
-Rubber spatula or spoon
-Measuring cups
-Cake pan or tray - I prefer glass, but metal is fine too
(approx. 9”x13”… any shape tray or dish, as long as you end up with approximately 1cm of thickness of the gelatin mix for the plate, so the pan/tray should be at least an inch tall.)
-Newspaper, newsprint, or other thin paper (even copy paper works), torn into strips the width of the pan/tray
Instructions:
1) Prep all ingredients, utensils, and tools before you start. Once you start, the gelatin reacts quickly, so it’s best to have everything ready and at hand.
2) Pour 1 ½ cups of glycerin slowly into the mixing bowl, avoiding bubbles.
3) Pour 1 cup of gelatin/agar agar powder into the bowl with the glycerin and stir in slowly to saturate powder. Let this sit for about 15 minutes. Gelatin will start to “bloom”.
4) Slowly pour in 1 ½ cups of boiling water. It’s best to pour against the side of the bowl, again to avoid adding extra air bubbles.
5) Stir slowly for 5 to 6 minutes. Even if it’s lumpy, resist the urge to whisk quickly. Keep it slow and steady. You can squish and break-up some of the lumps with your spoon or spatula against the side of the bowl.
6) Repeat this 4x:
--- Microwave the mixture in the bowl on high for 30 seconds.
--- Stir slowly for 30 seconds, pressing any lumps against the bowl to flatten.
7) Once fully blended, slowly pour the mixed liquid into your pan/tray, again trying to avoid air bubbles. It helps to keep the bowl low while pouring into the pan.
8) You will likely see some bubbles on the surface of the poured mixture, so use strips of newspaper to drag across the top and skim the surface of the gelatin mixture and gently scoop out any bubbles.
9) Make sure the tray is completely level. Leave the tray to set. DO NOT MOVE the tray until the mixture has set (approximately 2 hours).
10) Once set, place the tray in the fridge for the final setting, approximately 4 hours (up to over night). The gelatin mixture will shrink slightly, making it a little easier to remove it from the tray.
11) Once fully set, use a knife to separate the mixture from the tray while using your fingers on the top of the plate to pull back and allow air under the gelatin plate. Carefully put your fingers between the gelatin plate and the wall of the tray to begin lifting it out.
--- At this point, you can use an x-acto knife to cut the gelli plate into smaller pieces, and cut off any curved edges that you may have from your tray/pan, if needed.
--- Scraps from edges, or from future torn gelli plates, can be cut into small cubes, put into a glass cup or bowl, and melted down in the microwave again (heat, stir, heat stir… 30 seconds at a time)… pour into a new dish/pan to make a new gelli plate!
12) Carefully remove the gelatin plate and set it onto a sheet of stiff plastic, plexiglass, or acetate.** A second sheet of plastic/acetate will protect the surface of the plate.
**NOTE: Once complete, do not leave the gelatin plate on a metal pan as this will cause rust of the pan and mold of the gelatin plate.
Full prep took about 35-40 minutes, plus the time to set after that.
Good luck and have fun!
Видео Making Gelli Plates for Printmaking канала Mrs. Lewonka's Art Studio
Показать
Комментарии отсутствуют
Информация о видео
25 марта 2021 г. 3:51:25
00:11:18
Другие видео канала
 Gel Plate Printing Techniques 101 🎨 Basic tips for complete beginners!
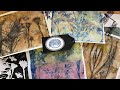 Revisiting Faux botanical prints with the Gelli Plate
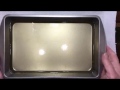 Build Your Stash and Craft, wk 15, Diy gelli plate, step by step, recipe is in description box:)
 DIY: Make Your Own Permanent Gelli Plate with Household Items!!
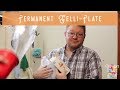 January 1st, 2018: Permanent Gelli-Plate
 Make_a_permanent_gelatin_plate_AKA_hectograph
 gelli plate making
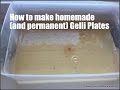 Homemade and Permanent Gelli Plate Recipes
 How to Make a Gelli Plate
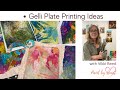 Gelli Plate Printing Ideas
 Gelli Plate Monotypes - Elementary School
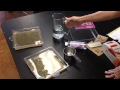 How to Make a Permanent Gelli Plate - Quick Vid
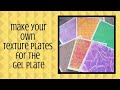 Make your own Texture Plates for the Gel Plate
 How to Make Mini Gelli Plates
 The Ultimate Homemade Gelli Plate
 Botanical prints with a gelli-plate
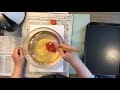 Making a long lasting gelatine plate for geli printing
 DIY CHEAP Gelli Printing Tools & Student vs. Regular Gelli Plate
 Monoprinting with Golden OPEN Acrylics on Gelli® Plates
 Magazine Image Transfer with the Gelli Plate: Part 1