How to Make Recorded Video Lectures?👩🏫 | MOVAVI HELPS
How to make recorded video lectures? Homeschooling goes easier with Movavi Video Editor: https://www.movavi.com/video-editor-plus/?asrc=main_menu&utm_source=youtube&utm_medium=youtube_EN&utm_campaign=HTnew_PERF_PRPS_VE_desc_win_pp_ID_rtSgDaavfi0
Promo code of 15% DISCOUNT: VLOG15 😁Only for subscribers!
And Movavi Screen Recorder: https://www.movavi.com/screen-recorder/?asrc=main_menu&utm_source=youtube&utm_medium=youtube_EN&utm_campaign=HTnew_PERF_PRPS_SR_desc_win_pp_ID_rtSgDaavfi0
Movavi Video Suite 2020: https://www.movavi.com/suite/?asrc=main_menu&utm_source=youtube&utm_medium=youtube_EN&utm_campaign=HTnew_PERF_PRPS_VS_desc_win_pp_ID_rtSgDaavfi0#main
📑 How to convert JPG to PDF https://youtu.be/0MWj-WDicjI?list=PLY9Wuok6GndrcMUfnnmtlhV5tv_haJrsZ
🏈 How to Watch Football Online? 7 Free Live-Streaming Sites https://youtu.be/kP-EcKKYETY?list=PLY9Wuok6GndrcMUfnnmtlhV5tv_haJrsZ
Want to record an online lecture or presentation on your laptop? In this video tutorial, we’ll show you how to record a video lecture. So stay tuned if you want to learn how to make your remote teaching materials even more effective.
STEP 1. GET VIDEO RECORDING EQUIPMENT
To record a video lecture for homeschooled students, you can use the built-in webcam and microphone in your laptop. However, using external recording equipment will enhance the sound and video quality of your lectures and help you provide better online tutoring content. We recommend buying a simple webcam (even if it’s not the best webcam for tutoring) and a mic. If you have a headset, you can use its microphone as well.
STEP 2. DOWNLOAD THE NECESSARY SOFTWARE
For your video lecture, you'll need a screen recording app and a video editing app. We recommend Movavi Screen Recorder and Movavi Video Editor Plus. As an alternative, you can download Movavi Video Suite – a powerful video solution that has both of the tools in one package.
STEP 3. RECORD YOUR LECTURE
OPTION 1: RECORD A WEBCAM LECTURE.
Plug-in your webcam and microphone and launch Movavi Video Editor Plus. Click the "Record video" button – the webcam recording app will open to capture your video lecture. Click "Start Capture" and when your lecture for remote students is finished, click "Stop capture". To view your recording, click "View saved files".
OPTION 2. RECORD A PRESENTATION
If your video lecture for homeschooled students is based on a PowerPoint presentation, you can record your screen with your voice and webcam video with the help of Movavi Screen Recorder. Draw the orange frame over the area you want to be captured and saved as your homeschool materials. Enable your webcam and microphone, and hit the round red icon to start recording a video lesson. When you're finished, click the "Stop" icon. To view the recordings of your video lecture and presentation, click "Show in Folder".
STEP 4. EDIT YOUR VIDEO LECTURE FOR ONLINE TEACHING
When you're done recording, you can also edit your online lecture to make your remote teaching materials look cooler. To do this, open Movavi Video Editor Plus. Watch your lecture and cut out unwanted parts and add text to your video. You can also insert any picture or animation into your lecture.
Now you know how to record a live webinar or online lesson for homeschooling on your PC or Mac. And you're amazing.
=============================================
Follow Movavi on social media:
📺 YouTube: https://www.youtube.com/user/MovaviOfficial
📘 Facebook: https://www.facebook.com/Movavi/
📸 Instagram: https://www.instagram.com/movavi_software/
How to make recorded video lectures? 👩🏫 https://youtu.be/rtSgDaavfi0
#movavi_vlog #movavi_helps #movavi_homeschooling
Видео How to Make Recorded Video Lectures?👩🏫 | MOVAVI HELPS канала Movavi Vlog
Показать
Комментарии отсутствуют
Информация о видео
Другие видео канала
 How to make lesson videos, screen recordings in less than 6 minutes
 Complete Beginner’s Guide to Movavi Screen Recorder
 How to Make a Video in PowerPoint - ppt to video
 how to shoot innovative lectures | educational videos by mobile camera | chalk talk tutorials
![HOW TO LOOK BETTER ON ZOOM [ How to Light & Angle Your Screen to Look Your Best]](https://i.ytimg.com/vi/YO6utfQm7Bg/default.jpg) HOW TO LOOK BETTER ON ZOOM [ How to Light & Angle Your Screen to Look Your Best]
HOW TO LOOK BETTER ON ZOOM [ How to Light & Angle Your Screen to Look Your Best] Movavi Video Editor: Step by Step Tutorial for Beginners in ONLY 20 Minutes
 Movavi Animation
 Record your video with presentation on SmartPhone | Make Educational Video from Mobile
 How To Use Movavi Video Editor Plus 2021 (Easy Tutorial)
 How To Remove Green Screen Easily? / Chroma Key Basics in 10 Minutes / Tutorial
 HOW TO RECORD VIDEO LECTURES | Using OBS for Online Teaching
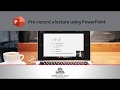 Create a Pre-recorded Lecture with PowerPoint
 How to record GREAT Video Lectures (39 Tips)
 how to youtube
 How to make Stop Motion video (Cooking Vlog)
 How to RECORD a PowerPoint Presentation with AUDIO and VIDEO
 Movavi Screen Recorder: Review and Demo (2021)
 How to create an online course THAT SELLS (from a 7 figure course creator)
 How to make AWESOME VIDEOS for your online course (video recording tutorial)