DIY File Guide With Ikea Ceramic Inserts
Last month while trying to modify an ikea ceramic blade I realized how hard this ceramic material actually is. Sand paper, files and even the belt grinder do nothing at all to this kind of hard ceramic! So, since I had another blade from the three set I bought at Ikea I decided to take advantage of this hardess to make something useful, a file guide! Very handy to square up materials, true up tang transition in hidden tang blades and also grinding accurate plunge line and bevels.
Having something that is so abrasive resistant on the face of this tool helps to keep it accurate for loner period of time compared to just steel that would inevitably be scratched by abrasive even if hardened to high degrees.
The design of this tool is inspired by Bill Behnke:
http://www.billbehnkeknives.com/available_items.html
I used scrap mild steel stock, 6mm stainless steel pins and M6 bolts. Ended up being a bit beefy, might be a bit more comfortable if it was ligher while holding it in hands but it's super solid to work on in a vise. I'll try to make another one, just way ligher to use on the grinder only.
While grinding the bevel at the end I also realized that my 2x72 does not work with this kind of thick jig, on the right side the frame does not leave enough clearance for the guide. Tha'ts why for this first experiment I ground a single bevel. Might be time for a new belt grinder build? We'll see!
I just started to list some of the stuff I use for my projects in this amazon storefront:
https://www.amazon.com/shop/blackbeardprojects
It's affiliate marketing, so if you order something from here you'll help the channel for free! Thank you!
List of products and operations:
0:20 Cut ceramic blade with diamond wheel on the angle grinder (off camera I cleaned the edges very carefully with that same diamond wheel, it's the only tool I have that can cut this stuff)
1:12 Scrap mild steel plate
1:25 Cut two strips with metal cutting band saw
1:53 Clean inside face of the jig nice and flat with 2x72 belt grinder
2:30 Tack weld the edges so ensure perfect match drilling
2:45 Center punch necessary holes
2:55 So nice to have a precise drill press. Locking materials in the vise with a steel ball to keep everything nice and straight (one side of the material is not even at this point, the ball helps the holes to stay square with the good face)
4:10 Separate the two parts by grinding off tack welds
4:30 Start the tapping process on the drill press to keep the tap square to the piece
5:00 Easier to finish the tapping by hand
5:22 Cut to size two steel pins
6:10 With the two parts locked with bolts I square up all other faces
6:35 Weld pins in one side so they don't fall
7:00 Clean with solvent
7:12 Glue with superglue (epoxy would be better, I'm not sure if I want to use longer pieces of ceramic yet to cover more of the guide, superglue is easy to remove with heat)
8:15 This is how it's used to clean the tang transition
9:20 This is how it's used to get clean plunge lines
Thanks a lot for watching, I hope you liked the video!
Suggestions and comments are always welcome.
Leave a like and share to anyone who might be interested! Thank you!!!
★Patreon★
https://www.patreon.com/blackbeardprojects
★Website★
http://blackbeardproject.com/
★Follow me★
Facebook ► https://www.facebook.com/BlackBeardProjects/
Twitter ► https://twitter.com/BlackBeardProje
Instagram ► https://www.instagram.com/black_beard_projects/
Видео DIY File Guide With Ikea Ceramic Inserts канала Black Beard Projects
Показать
Комментарии отсутствуют
Информация о видео
Другие видео канала
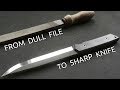 Making a Knife from an Old File
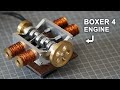 Making a Solenoid Boxer 4 Engine
 Insanely Big Butcher Cleaver Restoration. SORT OF...
 Top 3 Genius Ideas
 1947 Swiss Made COFFEE GRINDER - Piccolo - Restoration
![[ HSS KNIFE MAKING ] 하이스강 나이프 핸들 제작](https://i.ytimg.com/vi/tdI0xXqafMA/default.jpg) [ HSS KNIFE MAKING ] 하이스강 나이프 핸들 제작
[ HSS KNIFE MAKING ] 하이스강 나이프 핸들 제작 MORSA DE FACAS -Knife Vise
 Blacksmithing - Forging dome head rivets
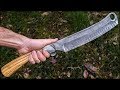 Finishing The "Slavic Razor" forged by MAN AT ARMS
![1883 Wrench Patent [Resurrection]](https://i.ytimg.com/vi/PXWK7H1N834/default.jpg) 1883 Wrench Patent [Resurrection]
1883 Wrench Patent [Resurrection] Knife Making: Filework (Without Actually Using Files)?
 Angle Grinder Sliding Cutting Jig
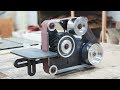 2 x 48" Belt Grinder Build / 작은 사이즈의 벨트그라인더 만들기
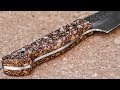 Cork Stabilization IKEA Pot Stand
 오래된 톱날로 멋진 도끼 만들기 / Making a Hatchet from an Old Saw
 Turn A 2€ Rusty Knife Into High-End Japanese Chef's Knife
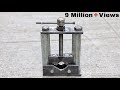 Top 12 amazing ideas | Useful tools
 Knife Making: Japanese Nakiri | Making New One After 2 Years
 Upcycling Ball Bearing Into Rings | Machinist Ring!
 Antique Hand Plane - Restoration