Blackmagic ATEM Mini Pro Setup Tutorial - Live Streaming Tips
The Blackmagic Design ATEM Mini Pro is my favorite piece of equipment for live streaming video to Facebook, YouTube, Zoom and more. I love it so much that I bought a second one so I can have a permanent setup in my new studio and one in a road case to go. If you’re looking to livestream or even conduct multi-camera setups this is a fantastic piece of gear that should be in every videographer’s kit. At only $600 for the mini pro and $900 for the ATEM Mini Pro ISO, the price cannot be beaten by nearly any other professional live-streaming equipment maker at the moment.
In this video, I’ll share with you my entire setup from start to completion. I’ll even talk about my special multi view solution so I can have all four cameras on a 15.6” monitor looping out to the ATEM Mini Pro. This same solution can help bring multi view to the ATEM Mini model if you have their original product. Remember - the ATEM mini does not have a multi viewer, only the mini pro and the mini pro iso do.
To see a video on how my multi view setup works you can watch this: https://www.youtube.com/watch?v=PeJD09PWRNI
In this video you’ll see step by step but if you’d like to fast forward here are some key times you can look out for:
0:20 - Intro
0:58 - ATEM Mini Pro Unboxing
2:30 - USB-C Cables for the ATEM Mini/Pro/ISO
4:05 - Atomos Shogun 7 Monitor
8:30 - Seetec ATEM 156 Multiview Monitor
12:38 - Connecting A Computer for Video Playback
13:40 - Decimator MD/HX Converter/Scaler/Splitter
20:05 - Connecting to Wired Internet Switch
22:05 - Running a Speed Test
25:05 - Connecting The Livestream Computer via USB-C
25:52 - Outro
Видео Blackmagic ATEM Mini Pro Setup Tutorial - Live Streaming Tips канала Zephan Moses
Показать
Комментарии отсутствуют
Информация о видео
Другие видео канала
 YoloLiv YoloBox - Part 2 Portable Multi Camera Live Streaming Device Setup
 COMPLETE SETUP - ATEM Mini Pro
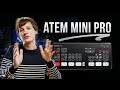 ATEM Mini Pro - In Depth Review & COMPLETE Tutorial !
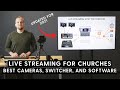 Church Live Streaming Setup 2021 | Best Cameras, Switcher, Software, and Multi-Streaming Platforms
 ATEM Mini Extreme and ATEM Mini Extreme ISO Announcement
 BlackMagic ATEM Mini Pro ISO Recording and OBS... AT THE SAME TIME!!
 ATEM Mini Pro | How To Stream to Facebook Tutorial
 Ultimate WFH / LIVESTREAM SETUP with iPad Controls
 ATEM Mini and Camera Update
 Video Monitor, Recorder and Switcher IN ONE CASE!
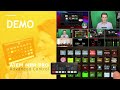 DEMO - Advanced Control of ATEM Mini Pro with Free Companion Profile
 BlackMagic ATEM MINI: 5 Top Tips & Tricks | Save Setup, Monitor Audio + More!
 Atem Mini Pro Tutorial | The Essentials You Need to Know
 CONNECT YOUR ATEM MINI TO A NETWORK | How to do it & why you should!
 ATEM MINI EXTREME | What you need to know!
 ATEM MINI PRO COMPLETE CHURCH SETUP | House Sound, Cameras, Lyrics, Scripture, EVERYTHING
 How To Play Videos On ATEM Mini | OBS Setup + Tips
 Yes, Blackmagic ATEM Mini has PREVIEW! (but not MULTI-VIEW)
 Live-Streaming with the ATEM Mini Pro - Small Church
 How to add graphics and titles with the Blackmagic ATEM Mini