Beginner needle tatting. Earrings DIY / Фриволите иглой для начинающих. Серьги
Needle tatted earrings with matching bracelet for beginners ❤ ↓↓↓EXPAND FOR MORE DETAILS ↓↓↓ PDF pattern - https://www.etsy.com/listing/621535770/needle-tatting-pdf-pattern-of-earrings?ref=shop_home_active_1
In this video tutorial, I'll show how to needle tat earrings matching the bracelet that we tatted in another video tutorial - https://www.youtube.com/watch?v=N3j8Na_ICWo.
_______________________________________________________
You can support my channel by:
♡ donating any sum - http://bit.ly/supportHobbyPoint
♡ watching ads
♡ subscribing to my channel
♡ hitting Like button and sharing the video
♡ leaving your comments under the video
_______________________________________________________
In this video, you will also learn the basic elements of needle tatting: a double stitch, a picot, a ring, and a chain. And you'll also learn how to firm your tatting.
Detailed lessons on tatting basics - https://www.youtube.com/playlist?list=PLFFZdiD8uXQtNmiXqT91sD7LsAHk1GZuA
For this project you will need:
- thread (the one I'm using is 100% mercerized cotton, 320 m/75 g)
- 2 earring hooks
- 2 beads (optional)
- a long needle with a narrow eye
- a crochet hook
- a needle threader
- scissors
- pliers
- some glue and a brush
You can find the pattern here - https://pin.it/xqicoe36tuwkim
The order of the elements shown in the video is marked in brackets
0:40 - 1st half of double stitch / 1st ring (1)
0:58 - 2nd half of double stitch
1:35 - a picot
3:31 - 2nd ring (2)
3:50 - a joint
5:45 - 3rd ring (3)
6:53 - a chain (4)
7:52 - a ring (5)
8:15 - a chain with a ring, i.e. a thrown ring (6)
10:33 - a ring (7) symmetrical to the ring (5)
12:32 - the last chain (8)
13:18 - hiding ends
15:37 - firming the tatting
16:31 - attaching the hooks
If you've enjoyed this video, hit the like button below and subscribe to my channel not to miss the next video!
PS: if your stitches are too tight and it's difficult to pull out the needle, try to use pliers - hold the needle and pull it out.
PPS: you can also tat a matching choker.
_______________________________________________________
Detailed lessons on tatting basics - https://www.youtube.com/playlist?list=PLFFZdiD8uXQtNmiXqT91sD7LsAHk1GZuA
_______________________________________________________
#hobbypoint #needletatting #tattedjewelry
Видео Beginner needle tatting. Earrings DIY / Фриволите иглой для начинающих. Серьги канала Hobby Point by Anastasiya
Показать
Комментарии отсутствуют
Информация о видео
3 апреля 2018 г. 2:36:03
00:19:24
Другие видео канала
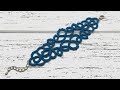 Beginner needle tatting. Bracelet DIY/ Фриволите иглой для начинающих. Браслет
 ITS TIME TO TAT SOME EARRINGS
 Кружевные Серьги фриволите иглой. Видео урок для начинающих. DIY Frivolite earrings with a needle
 Needle Tatting Basics
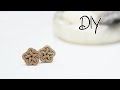 Needle tatting. Handmade stud earrings / Фриволите иглой. Серьги-гвоздики своими руками
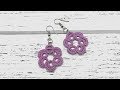 Beginner needle tatting. Earrings DIY / Фриволите иглой для начинающих. Серьги
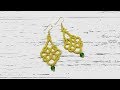 Needle tatting. Yellow earrings with a crystal bead / Фриволите иглой. Желтые серьги с бусиной
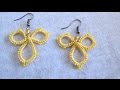 Needle Tatting Earrings
 An Introduction to Needle Tatting
 Серьги кисточки своими руками: 2 мастер класса ENG SUBS
 Серьги фриволите иглой видео мастер класс для начинающих. DIY earrings frivolite needle
 ニードル タティングレース 小花のモチーフ
 Tatting. Earrings, bracelet, choker. Giveaway/Фриволите. Серьги, браслет, чокер. Розыгрыш подарка
 NEEDLETATTING VARIATIONS EARRINGS PATTERN DIY PENDANT JEWELRY RINGS ACCESSORIES En Sub by LYPHUONG
 ニードルタティングレース 桜 の編み方
 Beginner needle tatting. Dragonfly with crystal beads / Фриволите иглой для начинающих. Стрекоза
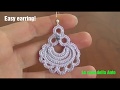 54' TUTORIAL ORECCHINI CHIACCHIERINO AD AGO EARRINGS NEEDLE TATTING Frivolitè Encaje фриволите
 Needle tatting. How to wrap a cabochon / Фриволите иглой. Оплетаем кабошоны
 Needle tatting. Earrings with pearl beads / Фриволите иглой. Серьги с жемчужными бусинами