etrailer | Lippert Electric Coach Step Replacement Door Switch Installation
Click for more info and reviews of this Lippert RV Steps:
https://www.etrailer.com/Accessories-and-Parts/Lippert/LC301694.html
Check out some similar RV Steps options:
https://www.etrailer.com/dept-pg-Accessories_and_Parts-sf-RV_Steps.aspx
https://www.etrailer.com
Don’t forget to subscribe!
https://www.youtube.com/user/etrailertv
Full transcript: https://www.etrailer.com/tv-review-lippert-replacement-door-switch-lc301694.aspx
Speaker 1: Today, we're going to be taking a look at the replacement door switch from Lippert Electric Coach Steps, part number LC301694.Now whether your switch is starting to go out or completely broke, our door switch is going to allow our stairs to come out and retract when we close the door automatically. Then, we won't have to worry about tripping or stepping up too far when we're getting in or out of our RV. One side of our switch is going to mount right here against the door. Then, the other side, we mounted ours right at the bottom of our screen door. That way whenever the screen door closes, the two sensors will meet and it'll cause the stairs to retract.Now, our switch is going to replace the door switch that came standard on the single, double or triple electric Lippert Coach Steps, or your Stromba Colson 00:00:50 sliding steps. If you're tired of the stairs not extending out or not retracting back in when you close or open the door, our door switch is going to be a great solution to get your motorized stairs working again.To begin our installation, we're going to have to make sure that our steps are working properly and that the problem is our switch.
Right now, I'm going to go ahead and switch the steps on. As you can see, the steps do come out. We can go ahead and close the door, and we can see that they're not retracting. We can tell that the motor is working perfectly fine, but the sensor or the switch right here on the door is not.The first step of our installation is going to be removing the old switch. Now, the one that's attached to the inside of the doorframe here, this one was broken off.
The wires are still attached, but the glue had let go a long time ago. To make it a little bit easier on myself, I'm going to cut my wires right here. If we follow the wires down, it'll lead to the floor and they're going to come out right here. I can go ahead and pull my wires out. One of them is going to be attached to the frame here with a self-tapping screw for our ground.
The other one's going to be connected into our harness that connects to the motor for our steps.We can take our new switch. We're going to find the end of the wires, and we're going to feed them down through the same hole that we got the other ones out. Once the wires come through, we're going to pull the excess out and get about how much we need for our switch. Now where my old wire went into my connector here, I'm going to go ahead and cut that wire back just right behind the connector. I'm going to strip it back.Now, on the end of the wire, I'm going to take a heat shrink butt connector inaudible 00:02:43 staying on the outside of the vehicle at all times.
I'm going to crimp it into place. Now, if you need some of these, you can pick some up on our website. These are just going to help from corrosion building up and moisture getting inside the connector.Now, we're going to take the longer of the two wires from our switch. I'm going to bring it towards the butt connector, and I'm going to insert it into the end and crimp it in place. Now, as far as the original ground goes, I'm going to go ahead and get rid of that bolt and pull my wire out and start afresh.I'm going to take a ring terminal, it's not in the kit but you can pick some up on our website, couple of different sizes that we carry. I'm going to take my wire, I'm actually going to fold it a couple of times to make it a little bit thicker, so I can crimp on my ring terminal. I'm going to take a self-tapping screw. Again, these aren't provided in the kit, but I'm going to attach it to the inside of the frame right here.We can go ahead and mount half our switch now. Now, there's two different ways that we can mount it. On the back, we have some double-sided tape. Just peel the backing off, and we can apply it directly to whatever surface we want. We also have two spots where we can put a couple of screws into place. I'm going to take mine and I'm just going to use the double-sided tape for now. I'm going to put it right against the door here so that when the other door closes, the other magnet will be right here next to it.Now, the other half of our sensor is going to be going on our screen door in our application. It's going to mount the same way. We're going to have some double-sided tape on the back. We're just going to adhere it to the bottom of the door so that when I close it, it'll line up with the other magnet. Now, they do provide us with some screws in our kit, but they are just a tad bit longer than the o
Видео etrailer | Lippert Electric Coach Step Replacement Door Switch Installation канала etrailer.com
Показать
Комментарии отсутствуют
Информация о видео
Другие видео канала
 etrailer Trailer Hitch Installation - 2014 Acura MDX
 etrailer | Stealth Hitches Hidden Towing Kit Trailer Hitch Installation - 2022 Hyundai Palisade
 etrailer | Rhino-Rack Camper Shell Heavy-Duty Bar Roof Rack Review
 etrailer | Thule T2 Pro XTR Bike Rack Review
 etrailer Radius End 4-Leaf Slipper Spring Installation
 etrailer | Curt TriFlex Trailer Brake Controller Installation - 2022 Ford Transit T250
 etrailer | Kuat Hitch Bike Racks Review - 2021 Ford Bronco Sport
 etrailer | Yakima SkyBox NX 18 Rooftop Cargo Box Review
 etrailer | B and W Companion OEM 5th Wheel Trailer Hitch Installation - 2020 Ford F-250 Super Duty
 Review of B and W Trailer Hitch Ball Mount - Tow And Stow 2 Ball 2-1/2 Inch Hitch - BWTS20037B
 etrailer | Titan Chain Diamond Alloy Snow Tire Chains Installation - 2019 Subaru Outback Wagon
 etrailer | Inno Shadow 16 Rooftop Cargo Box Review - 2022 Subaru Outback Wagon
 etrailer | Firestone Air Command Compressor System Installation - 2024 Ford F-250 Super Duty
 etrailer RV Bumper Cargo Carrier Review e96ZR
 etrailer | Air Lift WirelessAIR Compressor System Installation - 2017 Chevrolet Silverado 2500
 etrailer Trailer Hitch Installation - 2020 Acura MDX
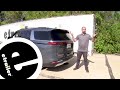 etrailer | Curt Class III Trailer Hitch Installation - 2022 Kia Carnival
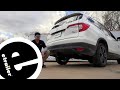 etrailer Class III Trailer Hitch Installation - 2022 Honda Pilot
 etrailer | Viking Solutions Truck Bed Adjustable Fishing Rod Carrier Review
 etrailer | Saris Bones Trunk Mounted Bike Rack Hatch Huggers Review
 etrailer | WeatherTech Under Seat Truck Storage Box Review - 2021 Ford F-150