Epoxy Countertops DIY Tutorial: How To Mix & Pour Bar Top Epoxy Resin Self Levling
Properly mixing and pouring Bar Top Epoxy is crucial to a successful project. Incorrectly measuring, mixing, or pouring can lead to a project that does not cure correctly.
Today http://epoxycountertopdiy.com/ demonstrates how to properly measure, mix and pour bar top epoxy on a sample piece of material. It is highly recommended to test a sample area or sample piece to familiarize oneself with how epoxy will react to a particular surface. In this example we use a piece of scrap cedar to test Incredible Solutions Table Top Epoxy. This is the same wood used on a cedar bar top as demonstrated in the video.
Reading the directions fully is imperative to a proper mix ratio & pour. Most table top epoxies require minimum temperatures. In this example, the epoxy resin requires a minimum of 70° with the optimal temperature 75°. Pouring in a dust-free, low humidity environment will insure a project that is not comprised by external. The Incredible Solutions Table Top Epoxy Kit is a 1:1 mix ration by volume. This was easily measured out in a graduated container.
Pouring a seal coat is highly advised in order to reduce bubbles. By pouring a very thin seal coat, bubbles are allowed to rise to the surface and ultimately escape. Using a torch or heat gun to disrupt the surface tension of the epoxy allows bubbles to release easier.
After 4 hours, the seal coat had cured enough to pour a flood coat. In the flood coat we allowed the epoxy to run off the sides of the project. See the difference before & after of the epoxy.
Incredible Solutions Review: http://epoxycountertopdiy.com/incredible-solutions-bar-table-top-review/
Epoxy Used: https://amzn.to/2TSdw9W
Graduated Containers: https://amzn.to/2zurEh3
Video By: http://epoxycountertopdiy.com/
Видео Epoxy Countertops DIY Tutorial: How To Mix & Pour Bar Top Epoxy Resin Self Levling канала Epoxy DIY
Показать
Комментарии отсутствуют
Информация о видео
Другие видео канала
 DIY Epoxy Table - How To Resin and Wood Table - How To Woodworking
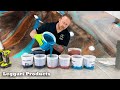 Use Epoxy To Coat Existing Countertops To Make Them Look Like Real Stone Step By Step Explained
 HOW TO - Epoxy TIPS & TRICKS - Countertop Epoxy - Epoxy Ocean Look - Dirty Pour Epoxy
 How to Apply Bar Top or Table Top Pour on Finish (Epoxy Resin)
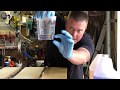 How NOT To Pour Table Top Epoxy Resin & How To Fix Uncured Epoxy
 Pour Your Own Clear Epoxy Bar Coating | Alumilite
 The SECRET to a Bubble Free Epoxy Finish
 How to Use Table Top Epoxy Resin
 5 EPOXY Tips I Wish I Knew As A Beginner!
 First Time Using Epoxy Walkthrough From Start To Finish | Coat Right Over Wood Surface | Dirty Pour
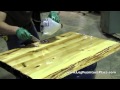 How Liquid Glass Finish is applied on Cabin Furniture at JHE's Log Furniture Place
 Epoxy Dirty Pour Technique On Custom Countertops Tutorial | DIY Countertop Remodel Ideas
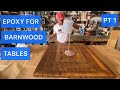 How to pour epoxy on a barnwood table and get a satin finish PART 1
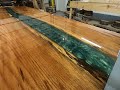 Making a River Table - Start to Finish
 DIY – How to Apply Clear Epoxy Resin – “Liquid Glass”
 Epoxy Dirty Pour Technique On Kitchen Countertops Full Tutorial | DIY Countertop Remodel Ideas
 Coffee table with epoxy resin Homemade
 This is The Easiest Way to Do a Resin Pour
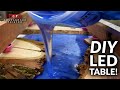 Epoxy Coffee Table with Walnut Slabs and LEDs
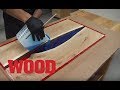 How To Make An Epoxy Resin Flowing Table - WOOD magazine