BMW E30 M3 Restoration | Continuing The Rebuild
Get a Shop Manual for Your Car: http://click.linksynergy.com/fs-bin/click?id=LtheKcMoh5s&offerid=819677&type=3&subid=0 (Available for Most Makes and Models)
In this episode, Antonio continues to rebuild what he can of the newly painted E30 M3 with new and restored parts.
My mic was ever so slightly broken when I recorded this episode. I had to cut the voice over short as it sounded awful. Let me know if you prefer a bit of talking just at the start, or all the way through. Better equipment is on the way either way.
Thanks for watching! Subscribe with the bell on to see these cars back to factory condition.
#restoration #BMWE30M3 #carproject
Thanks to FCP Euro for supplying parts for this restoration and supporting the channel. Get a lifetime guarantee on all parts here - https://hubs.ly/H0kPPZW0
Tools & equipment used:
Quartz Lacquer - https://goo.gl/8PTVKM
Base Coat Paint - https://goo.gl/mWhufG
Rust Remover - https://goo.gl/13gopW
Rohr 250 Welder - https://bit.ly/33mkOGP
U-Pol Weld Through Primer #2 - https://bit.ly/2qL38ak
Fast Mover 1kW Infrared Paint Dryer, Stand, Timer - https://bit.ly/2WYR9jJ
Workbenches - https://arborgardensolutions.co.uk
Moldex Full Face Mask - https://goo.gl/NNYGrv
FGL 5 Spray gun - https://goo.gl/Acg5rd
A.N.I. R150-T Mini Spray gun - https://goo.gl/cHTJS2
Colad Washable Overalls - https://goo.gl/3Css9E
Colad Mixing Cups - https://goo.gl/8DYmE8
Colad TurboMix Sticks - https://goo.gl/cYZfks
Colad Synthetic Paint Strainers - https://goo.gl/H79ZgL
Steel wire bits - http://geni.us/keyaD
Blasting Cabinet - https://bit.ly/2GxvKJ7
Blasting pot - https://bit.ly/32TMnrU
Cordless Ratchet - https://bit.ly/30YNlkG
Parts Wahser - https://bit.ly/2K5G9wA
Rotary Tool - http://geni.us/HGed
Concentrate Degreaser - http://geni.us/yUn9
Mannesmann Socket Set - http://geni.us/HCDZ
Time Stamps:
00:00 – Intro
00:08 - Installing the side skirt trim clips
00:22 - Installing the door trim clips & tape
00:41 - Installing the B exterior pillar trim
01:02 - Installing the door covering trim
01:20 - Installing the door handles
01:48 - Installing the outer door sill strip
02:02 - Installing the inner door sill strip
02:11 - Installing the door seal
03:15 - Installing the molding roof right
04:00 - Building the molding air outlets
04:32 - Installing the molding air outlet
05:40 - Installing the rear window seals
05:52 - Installing the new center cap emblems
06:54 - Polishing the badges
09:14 - Installing the bonnet badge
09:20 - Installing the center caps
09:25 - Installing the front bumper shocks
09:40 - Polishing the front kidney grill
09:59 - Installing the front grill badge
10:12 - Installing the new wing mirror glass
10:35 - Installing the wing mirror seals
10:57 - New horns
11:06 - Installing the clips and rubber grommets
11:49 - Removing the window masking
12:18 - Installing the rear windows
12:55 - Installing the wing mirrors
13:13 - Installing the interior B pillar trim
13:53 - Installing the door sill scuff trim
14:06 - Installing the kidney grill
14:20 - Installing the front door seals
14:48 - Installing the bonnet seal
15:03 - Cleaning the and de-rusting heatshields
15:27 - Installing the headlight clips
15:43 - Installing the headlights
16:07 - Installing the air intake tube
16:18 - Installing the front left grill
16:26 - Installing the front right grill
16:36 - Installing the air intake tube
16:44 - Installing the wiper grill left
16:53 - Installing the wiper grill right
17:00 - Installing the boot seal
17:23 - Installing the scuff plate
17:27 - Installing the front bumper
17:44 - Installing the side skirt clips
17:59 - Installing the side skirts
18:26 - Installing the latch strikers
18:42 - Installing the rear spoiler
19:12 - Engine, transmission, and LSD pick up
19:40 - Installing the rear bumper shocks
19:57 - Rebuilding the rear bumper
20:05 - Installing the bumper vinyl tape
20:53 - Installing the rear indicators
21:02 - Installing the bumper rubber foam
21:08 - Installing the bumper carrier
22:04 - Installing the rear bumper
22:25 - FInal shots of the car so far
Follow me on Social media to keep up to date with videos and behind the scenes.
My Patreon Page:
https://www.patreon.com/RestoreIt
My Twitter Page:
https://twitter.com/Restore__It
My Facebook Page:
https://www.facebook.com/RestoreItCha...
My Instagram Page:
@RestoreItChannel
PayPal Donations:
Restoreitchannel@gmail.com
Discord
I now also have a discord server if you want to chill with like-minded people and maybe learn something new.
https://discord.gg/vNmCBk9
Видео BMW E30 M3 Restoration | Continuing The Rebuild канала Restore It
Показать
Комментарии отсутствуют
Информация о видео
Другие видео канала
![BMW E30 M3 Leather Interior [Restoration]](https://i.ytimg.com/vi/Z1fXYjnhW_U/default.jpg) BMW E30 M3 Leather Interior [Restoration]
BMW E30 M3 Leather Interior [Restoration] BMW E30 M20B25 Engine Rebuild Restoration - | Part 9 | Putting It Back Together Again
![BMW E30 M3 Front and Rear Subframe [Restoration]](https://i.ytimg.com/vi/DSxLHdLIINE/default.jpg) BMW E30 M3 Front and Rear Subframe [Restoration]
BMW E30 M3 Front and Rear Subframe [Restoration] BMW E30 325i Sport M Tech 1 Front Bumper Restoration
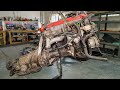 Mercedes W123 Engine Deep Clean - Steam Clean - Restoration
 Honda Raccoon Full Restoration | Honda 50cc 2 Stroke bike Restoration
![BMW E30 325i Touring Engine Bay [Restoration] - Almost Finished!](https://i.ytimg.com/vi/aSlvl6-gdOY/default.jpg) BMW E30 325i Touring Engine Bay [Restoration] - Almost Finished!
BMW E30 325i Touring Engine Bay [Restoration] - Almost Finished! BMW E30 325i Touring Engine First Start - What Happened To The Touring?
 BMW E30 M40 Engine Restoration - Rebuild Time-Lapse | Part 4
 BMW E30 Headlight Restoration | BMW E30 325i Sport Restoration E6 S1
 BMW E30 Limited Slip Differential Restoration
![BMW E30 M3 [Restoration] | Starting The Rebuild](https://i.ytimg.com/vi/CG0Ok7P8g68/default.jpg) BMW E30 M3 [Restoration] | Starting The Rebuild
BMW E30 M3 [Restoration] | Starting The Rebuild BMW E30 M40B16 Engine Restoration - Rebuild Time-Lapse | Part 1
 1988 BMW E30 M3 Tool Kit - Restoration
![BMW E30 Dashboard [Restoration]](https://i.ytimg.com/vi/s3EotMAZ-I0/default.jpg) BMW E30 Dashboard [Restoration]
BMW E30 Dashboard [Restoration] BMW E30 325i - Rusty Rear End Restoration - Opening A Can Of Worms
 The Restoration of Elvis' BMW 507
 BMW E30 Gas Tank Restoration
 BMW E30 M20B25 Engine Rebuild Restoration - The Machine Shop | Part 8
 BMW E30 325 Touring Engine Bay Restoration - I Found The Missing Piece