Start PRINTING your photos today | ESSENTIAL Tips and Tricks
Everything you need to know to start printing your photographs perfectly today! Whether you’re using a lab or you’re own printer I’ve got some tips to really help you out.
Landscape Photography Masterclass - http://bit.ly/landscape-masterclass
Fotospeed offer no longer applies. Sorry.
Buy the Canon Pro 10s - http://geni.us/CanonPro10s
Follow First Man Photography for the latest updates:
Instagram - http://instagram.com/adamkarnacz
Buy Prints - https://www.firstmanphotography.com/prints/
My Gear - https://www.firstmanphotography.com/my-gear/
Get a FREE trial of Adobe Lightroom CC and Photoshop - https://goo.gl/YznzDv
Podcast - https://itunes.apple.com/gb/podcast/first-man-photography-podcast/id1244725522
FREE eBook - http://www.firstmanphotography.com/ebook
Music by Dan Phillipson - http://www.danphillipson.com/
I absolutely love printing my pictures. It is the final step in creating an image and it just brings the work to life. I genuinely believe that photography is an art and when you print out a picture and hold it in your hand it is difficult to argue with that. You can see and feel the amount of work that has gone into creating the image and it takes on a new life once you can physically hold it in your hand.
I’m going to assume you are using Lightroom to edit your images but if you’re not the same applies to other software. I really recommend Lightroom though so I’ll put a link above where you can get a free trial. Once you have finished your edit and it’s time to print, the first thing to do is create a virtual copy of the image. This is going to be our print file. When we look at our image on a screen it is backlit by the monitor and once you print your image you obviously do not have that. So to compensate for this I always increase my exposure just a touch. Somewhere between a quarter and half a stop and it avoids the image printing out dull and disappointing. I then just pop that virtual copy into a collection so I have it for future reference.
Lab Vs DIY
So let’s just talk briefly about using a lab vs DIY.
Having your own good photo printer is a very nice thing. I have this Canon Pro 10s which prints up to A3+. It produces prints that are equal to the quality of a lab and I absolutely love it. It is expensive though and you need to work out whether it will be worth it for you.
A lab can often work out cheaper if you are not printing very often. They are also more versatile in terms of the size of print, the material you can print on and you can easily try out different papers. The downside is you’re not in control and the results can often be disappointing and colour not accurate.
Colour Accuracy
Accurate colour is important because we want our images to print out to match how we have edited them on the screen. You don’t your beautiful orange and pink sunset to print out green. There’s a lot going on to go from screen to paper so we use ICC profiles to make it easy. ICC profiles are based on the type of printer being used and the type of paper. Once installed we can go into Lightroom and enable soft proofing in the develop module, select the paper you want to use and get a good idea of how your print will look on paper.
Good labs should all provide ICC profiles for you to download for free and if you are printing yourself, paper companies should provide them for your printer model.
So once you have applied the profile and made an adjustments you are now ready to print.
Next we need to decide what type of paper we’re going to use. Generally there are three kinds
Glossy
Semi Gloss
Matt
The type and quality of the paper you use can massively affect the final print. It is very much a personal thing and something you will need to experiment with. As a general rule though I use a glossy finish for images that are heavily saturated and colourful.
The glossy finish really helps the colours to pop and it works perfectly for my water drop images and they just look brilliant.
Semi Gloss - I think is my favourite. I have been using Canson Baryta for years and it’s just a magnificent paper. It feels and looks extremely professional and high quality and works a really wide range of images. The majority of landscape prints I sell are printed on this.
Matt or Rag paper - Good cotton rag paper is the best bet for a matt finish. Good rag papers will have a high DMax rating which mean they hold the blacks very very well. Rag papers are perfect for black and white images although are also great for certain landscapes and colour portraits when a more muted fine art feel is required.
My video photography blogs are designed to entertain and document how I go about capturing my work. If it provides landscape photography tips and inspiration along the way then please share it with your friends so more people can benefit from the content. If you enjoyed this photography vlog I would really appreciate it if you subscribed to the channel so you can come along for the journey.
Видео Start PRINTING your photos today | ESSENTIAL Tips and Tricks канала First Man Photography
Показать
Комментарии отсутствуют
Информация о видео
Другие видео канала
 My Printing Workflow from Start to Finish
 Top Ten Best Home Photo Printers - 2021
 Matting and Framing Tutorial
 Advice on Printing your Images
 Is it Worth Printing Your Own Photos?
 How To Get Photos Ready For Print
 Intro to Fine Art Digital Printing
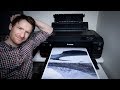 Why Would Anybody Buy a Printer?
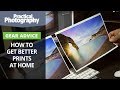 Learn how to get better home photographic prints from an expert
 How I Print Photos At Home
 How and why I print my photographs
 How BIG can you PRINT your PHOTOS? (Fuji XT3 vs Nikon Z7 vs GFX 50R)
 Selling Prints- HUGE MISTAKES I Wish I Didn't Make!
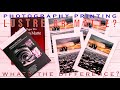 Lustre or Matte Which Paper Is Best For Your Photograph? Best Paper for Printing
 Print Bright Colors! Photo Rag Baryta - Hahnemühle + Canon Pro-4000
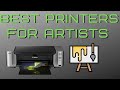 Best Printer for Art prints and Artists in 2020 (Print your art at Home)
 Make Your Images Bigger for Print
 Top 6 Photo Printing Tips (with Printlab Chicago) | PHLEARN
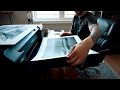 You NEED to be printing your photos!! Here's why..