How to Upgrade to a Pressure Balanced Shower Valve | Ask This Old House
Ask This Old House plumbing and heating expert Richard Trethewey travels to Salt Lake City to replace a shower valve he has never seen before in his career with a conventional pressure balanced one.
#ThisOldHouse #AskTOH
SUBSCRIBE to This Old House: http://bit.ly/SubscribeThisOldHouse
Time: 2-3 hours
Cost: $200
Skill Level: Moderate
Tools:
Oscillating saw [https://amzn.to/39eK1X2]
Pipe cutters [https://amzn.to/31txpsn]
Blow torch [https://amzn.to/2Us7y2t]
Pipe deburring tool [https://amzn.to/2Ux8eDU]
Drill driver [https://amzn.to/2tvLMzE]
Shopping List:
Pressure balanced shower valve [https://amzn.to/2GXyrmU]
Retrofit cover plate for valve [https://amzn.to/39jAvlv]
½-inch copper pipe [https://amzn.to/2tA5iex] and fittings [https://amzn.to/2H2nmRr]
Solder [https://amzn.to/375y8RD]
Flux [https://amzn.to/2S7iP6V]
Tub spout [https://amzn.to/2H0EmaS]
Shower head [https://amzn.to/2vQvjqx]
2x4 dimensional lumber [https://amzn.to/31wD0hr]
Pipe hangers [https://amzn.to/2ONu967]
Steps:
1. Start by shutting off the water at the water main.
2. Find reasonable access to the shower valve. Some houses will have access panels in the room behind the shower valve. In this case, Richard removed a cabinet in the kitchen that allowed them to cut their own access hole.
3. Trace the outline of the retrofit cover plate over the hole from the old valve. Allow yourself about an inch all the way around for a margin of error.
4. Cut the fiberglass along the outline of the shower valve using an oscillating saw.
5. Cut out the old shower valve and pull out the old plumbing. This may require cutting with the oscillating saw or using pipe cutters.
6. Assemble as much of the valve body assembly as possible outside of the access panel to allow for ease of work. When as much of it has been put together, solder everything together to ensure a watertight seal. This will include:
a. Cutting the pipes to size
b. Cleaning the insides of the fittings and the outsides of the pipes
c. Applying flux to the insides of the fittings and outsides of the pipes
d. Holding the torch at an angle to heat up the pipe along the joints
e. Applying the solder to the joints at the appropriate moment. The solder should appear to suck into the joints when it’s at the right temperature.
7. Drop the assembly into the access panel and line up the valve body with the center of the hole.
8. Measure, mark, cut, and solder together the rest of the pipe fittings. This will most likely include a tub spout and the shower head.
9. Secure the pipes to structure using the pipe clips and a drill driver. If needed, add additional structure in between the joists. This will prevent the pipes from banging around inside the wall.
10. Connect the pipe assembly to the hot and cold water lines at the appropriate location.
11. Turn the water back on and check for leaks.
12. Install the trim over the shower valve.
Resources:
Richard installed a Temptrol Pressure Balanced Tub/Shower Valve [https://amzn.to/2S6sFWC], which is manufactured by Symmons (https://www.symmons.com/). They also manufacture the retrofit cover plate [https://amzn.to/2v9Eimq] Richard used to conceal the hole left behind from the old valve.
The sink hole cover [https://amzn.to/39ef19k] that Richard used to seal the hole from the old shower head is manufactured by Danco (https://www.danco.com/) and can be found at home centers.
The other materials Richard used to complete the valve replacement, including the copper pipes, copper fittings, solder and flux can all be found at home centers and plumbing supply houses.
About Ask This Old House TV:
Homeowners have a virtual truckload of questions for us on smaller projects, and we're ready to answer. Ask This Old House solves the steady stream of home improvement problems faced by our viewers—and we make house calls! Ask This Old House features some familiar faces from This Old House, including Kevin O'Connor, general contractor Tom Silva, plumbing and heating expert Richard Trethewey, and landscape contractor Roger Cook.
Follow This Old House and Ask This Old House:
Facebook: http://bit.ly/ThisOldHouseFB
Twitter: http://bit.ly/ThisOldHouseTwitter
http://bit.ly/AskTOHTwitter
Pinterest: http://bit.ly/ThisOldHousePinterest
Instagram: http://bit.ly/ThisOldHouseIG
Tumblr: http://bit.ly/ThisOldHouseTumblr
Keywords:
This Old House, Ask This Old House, DIY, Home Improvement, DIY Ideas, Renovation, Renovation Ideas, How To Fix, How To Install, How To Build, Richard Trethewey, plumbing, shower, tub, valve, pressure balanced
Watch the full episode:
https://www.thisoldhouse.com/season-18-ask-toh-episodes
How to Upgrade to a Pressure Balanced Shower Valve | Ask This Old House
https://www.youtube.com/user/thisoldhouse/
Видео How to Upgrade to a Pressure Balanced Shower Valve | Ask This Old House канала This Old House
Показать
Комментарии отсутствуют
Информация о видео
Другие видео канала
 How to Replace a Kitchen Sink and Faucet | Ask This Old House
 How to Install an Anti-Scald Shower Valve | Ask This Old House
 Shower Valve Cartridge Replacement (NO HOT WATER FIX)
 How to Install a Cable Railing | Ask This Old House
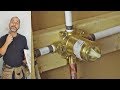 DIY How To Install Copper To Pex Shower and Bath Plumbing
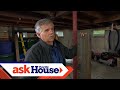 How to Repair a Damaged Carrying Beam | Ask This Old House
 How to Tightly Fit an Antique Door | Ask This Old House
 How to Clean a Clogged Shower Cartridge | Ask This Old House
 How to Replace Polybutylene Piping with PEX | Ask This Old House
 Low Water Pressure in the Shower - Learn how to increase water pressure
 How to Install a Pressure-Balance Shower Valve | This Old House
 How to Install a New Toilet | Ask This Old House
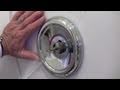 How to Repair a Moen Shower/Tub valve
 How to Install a Touchless Kitchen Faucet | Ask This Old House
 How to Diagnose Plumbing Drain Problems | Ask This Old House
 How to Replace a Shower Mixing Valve | This Old House
 How to Repair a Cast-Iron Toilet Flange | Ask This Old House
 How to Vent a Clothes Dryer | Ask This Old House
 4 Types of Shower Valve Assembly Installations